If you love banana cake but want a healthier, more flavorful twist, this Banana Cake with Sourdough Recipe is for you! Using sourdough starter not only enhances the taste but also makes the cake softer, easier to digest, and gut-friendly.
Baking with sourdough discard is a fantastic way to reduce food waste while creating a moist, delicious cake that stays fresh longer. Plus, the natural fermentation in sourdough adds depth to the flavor, making this banana cake irresistibly delicious with a hint of tang.
In this post, you’ll learn:
Why sourdough makes banana cake better
The best ingredients for a healthy and easy bake
Step-by-step instructions for the perfect texture
Tips to customize and store your cake
Let’s dive in and make this easy, wholesome, and mouthwatering sourdough banana cake! 🍌🎂
Why Use Sourdough in Banana Cake?
Health Benefits – Improved Digestion, Lower Gluten, Probiotic Properties
One of the biggest advantages of using sourdough starter in banana cake is the health benefits it brings compared to traditional baking methods. Here’s how incorporating sourdough can make your banana cake not only delicious but also better for your gut and overall well-being.
1. Improved Digestion
Sourdough fermentation pre-digests the starches and proteins in flour, making it easier on the stomach. The natural bacteria in the sourdough starter help break down phytic acid, an anti-nutrient found in grains that can interfere with mineral absorption. As a result, your body can better absorb nutrients like iron, magnesium, and zinc from the cake.
Additionally, the slow fermentation process reduces bloating and digestive discomfort, making this banana cake a great choice for those with sensitive stomachs or mild gluten sensitivities.
2. Lower Gluten Content
While sourdough banana cake isn’t completely gluten-free, the fermentation process partially breaks down gluten proteins, making it easier to digest than conventional banana bread or cakes made with regular flour. This is especially helpful for people with gluten sensitivity (but not celiac disease) who may find that sourdough-based baked goods cause less bloating and discomfort.
For an even lower gluten option, you can use whole wheat flour, spelt flour, or a mix of gluten-free flours along with your sourdough starter.
3. Probiotic Properties for Gut Health
Although the live probiotics in sourdough starter don’t survive the baking process, the fermentation process still creates prebiotics—a type of fiber that feeds the beneficial bacteria in your gut. This promotes better digestion, a stronger immune system, and overall gut health.
Additionally, sourdough baking reduces sugar spikes by slowing down carbohydrate absorption, which is beneficial for maintaining stable blood sugar levels—a great advantage if you’re watching your sugar intake or looking for a healthier dessert option.
Enhanced Flavor & Texture – Mild Tanginess, Extra Softness, and a Longer-Lasting Moist Crumb
One of the best reasons to use sourdough starter in banana cake is the way it enhances both flavor and texture, making the cake softer, more flavorful, and longer-lasting. If you’ve ever had a dry or bland banana cake, adding sourdough will elevate the taste and improve the overall eating experience. Here’s how:
1. Mild Tanginess for a Deeper, More Complex Flavor
Sourdough fermentation introduces natural acids and yeasts that create a slightly tangy undertone, which balances the sweetness of ripe bananas. This gives your cake a more complex, bakery-style flavor without being overpowering.
The combination of fermentation flavors, natural sweetness from bananas, and warm spices like cinnamon or vanilla results in a rich, well-rounded taste that’s more interesting than a standard banana cake. If you’ve ever enjoyed the subtle tang of sourdough bread, you’ll love how it translates into a light, pleasant depth in this cake.
2. Extra Soft and Fluffy Texture
The fermentation process in sourdough helps break down gluten and starches, leading to a cake that is light, fluffy, and tender. The natural acids in the sourdough starter help soften the proteins in the flour, creating a more delicate crumb.
Additionally, sourdough acts as a natural leavening agent, working alongside baking soda or baking powder to create an airy, cloud-like texture. This means you get a cake that is moist and tender, without being dense or heavy.
3. Longer-Lasting Moist Crumb
One of the best-kept secrets of sourdough baking is its ability to keep baked goods fresh for longer. Unlike traditional banana cake, which can dry out within a day or two, sourdough banana cake retains moisture and stays fresh for several days.
Here’s why:
Natural acids in sourdough help retain moisture, preventing the cake from drying out too quickly.
Fermentation changes the starch structure, allowing the cake to hold onto its softness even after a few days.
Bananas already add natural moisture, and when combined with sourdough, the cake remains soft and tender longer than regular banana cakes.
This means you can bake ahead, store it well, and still enjoy a moist and flavorful cake without needing extra butter or oil.
Why This Matters
If you’ve ever had banana cake that turns dry or stale too quickly, using sourdough starter will solve that problem. The result is a cake that is:
More flavorful – With a light tang that enhances the banana’s natural sweetness.
Softer and fluffier – Thanks to natural fermentation and gluten breakdown.
Moist and long-lasting – Stays fresh for days, making it perfect for meal prep or sharing.
So, not only do you get a deliciously soft and moist banana cake, but it also tastes even better on the second or third day!
Perfect for Using Sourdough Discard – Great Way to Avoid Waste and Use Extra Sourdough Starter
If you’re a sourdough baker, you probably know the struggle of what to do with leftover sourdough discard. Instead of throwing it away, why not use it to make a delicious, moist, and healthy banana cake? This recipe is a perfect way to repurpose extra sourdough starter while reducing kitchen waste.
Here’s why using sourdough discard in banana cake is a smart, sustainable, and tasty choice:
1. Reduces Food Waste in a Delicious Way
Maintaining a sourdough starter requires regular feeding, and that often means discarding a portion of it. Instead of wasting it, you can incorporate the discard into baked goods like banana cake.
No more throwing away starter—every bit gets put to good use!
Makes your baking more sustainable by minimizing waste.
Adds nutritional benefits without altering the overall taste too much.
This way, you can enjoy a delicious homemade treat while making your sourdough baking more eco-friendly.
2. Adds Flavor Without Overpowering the Cake
Sourdough discard brings a subtle tanginess that enhances the natural sweetness of bananas. Unlike traditional sourdough bread, where fermentation develops a strong sour flavor, banana cake only picks up a mild hint of tang, making the flavors richer and more balanced.
The acids in the sourdough discard interact with the sweetness of bananas to create a perfect flavor balance.
If you prefer a less tangy cake, use a younger, less acidic starter discard (one that hasn’t been sitting in the fridge for too long).
For a more pronounced sourdough taste, use a well-fermented discard or let the batter rest for a few hours before baking.
3. Works Well in Quick Breads and Cakes Without Extra Effort
Sourdough discard is naturally wet and sticky, making it easy to incorporate into cake batters. Unlike bread baking, where you need to worry about proofing and gluten development, banana cake doesn’t require extra fermentation time—you can mix the discard directly into the batter and bake immediately.
No additional rising time needed—just mix, pour, and bake!
Works with both active and inactive sourdough discard (even if your starter hasn’t been fed recently).
Naturally complements the soft, moist texture of banana cake without affecting the structure.
This makes it one of the easiest ways to use up excess sourdough starter without the extra work involved in traditional sourdough bread baking.
4. Gives Your Cake a Slightly Better Texture & Shelf Life
Adding sourdough discard to banana cake helps improve the texture by making it softer and more tender. The natural fermentation in the starter breaks down some of the starches and proteins, leading to a lighter, more delicate crumb.
The cake stays moist for longer, meaning it won’t dry out as quickly as regular banana cake.
The natural acidity in sourdough discard helps preserve freshness, extending the cake’s shelf life.
Even after two or three days, the cake still tastes fresh, thanks to the moisture retention from sourdough.
This is perfect if you like to meal prep, bake in advance, or enjoy leftovers without losing flavor or texture.
Why This Matters
A practical way to use up sourdough discard instead of wasting it.
Enhances the cake’s flavor and texture with minimal effort.
Keeps the cake moist and fresh for longer, making it a great make-ahead treat.
No need for complicated fermentation steps—just mix and bake!
So, if you’re looking for a simple, healthy, and waste-free way to enjoy your sourdough baking, this banana cake is the perfect solution! 🍌🎂
Ingredients for the Best Sourdough Banana Cake
Main Ingredients – Ripe Bananas, Sourdough Starter, Whole Wheat Flour, Eggs, Coconut Sugar
The key to making a delicious, moist, and wholesome sourdough banana cake lies in the ingredients you choose. Each ingredient plays an essential role in creating the perfect texture, flavor, and nutritional value. Let’s take a closer look at the main ingredients and why they are so important.
1. Ripe Bananas – Natural Sweetness and Moisture 🍌
Bananas are the star ingredient in this cake, providing natural sweetness, moisture, and a rich flavor. The riper the bananas, the better—look for ones that are deep yellow with brown spots or even completely brown.
Natural sweetness: Overripe bananas contain more natural sugars, reducing the need for added sweeteners.
Moist texture: Mashed bananas help create a soft, fluffy crumb and prevent the cake from drying out.
Nutritional benefits: Bananas are packed with potassium, fiber, and antioxidants, making this cake a more wholesome treat.
💡 Pro Tip: If your bananas aren’t ripe enough, place them in a warm oven (300°F/150°C) for 10-15 minutes to speed up ripening.
2. Sourdough Starter – Flavor, Fermentation Benefits, and Texture 🥖
The sourdough starter (or discard) adds a unique depth of flavor, mild tanginess, and better texture to the cake. Whether you’re using active starter or sourdough discard, it enhances the cake’s overall quality.
Enhances flavor: The slight tang of sourdough balances the sweetness of bananas and adds a bakery-style taste.
Improves texture: Sourdough naturally makes baked goods softer, fluffier, and longer-lasting.
Adds gut-friendly benefits: Even though the probiotics in the starter don’t survive baking, the fermentation process helps break down some of the flour’s starches and gluten, making it easier to digest.
Perfect for using discard: A great way to avoid waste while making a delicious cake!
💡 Pro Tip: If you want a stronger sourdough flavor, let the batter rest for a few hours before baking to allow mild fermentation. If you prefer a milder taste, bake it immediately after mixing.
3. Whole Wheat Flour – Nutritional Boost and Hearty Texture 🌾
Using whole wheat flour instead of refined white flour adds fiber, vitamins, and minerals, making this banana cake healthier and more filling.
More fiber & nutrients: Whole wheat flour contains bran and germ, which are rich in fiber, iron, and B vitamins.
Slightly nutty flavor: It complements the banana’s sweetness and enhances the overall depth of taste.
Better digestion: Whole wheat flour is less processed, making it a better choice for those looking for a healthier alternative.
💡 Pro Tip: If you want a lighter texture, use a 50/50 mix of whole wheat flour and all-purpose flour. If using 100% whole wheat, add an extra tablespoon of liquid (milk, yogurt, or water) to keep the cake moist.
4. Eggs – Structure, Moisture, and Richness 🥚
Eggs play a crucial role in binding the ingredients together, adding structure, and keeping the cake moist. They also add a slight richness to balance the natural tanginess from the sourdough.
Adds moisture & softness: Eggs help create a tender crumb and prevent dryness.
Acts as a natural binder: Holds the ingredients together, ensuring a stable structure.
Provides richness: Enhances the cake’s flavor and texture.
💡 Egg Substitute Option: If you want to make this cake egg-free, replace each egg with:
- 1 mashed banana (for extra moisture)
- 1 flax egg (1 tbsp ground flaxseed + 3 tbsp water)
- 1/4 cup unsweetened applesauce
5. Coconut Sugar – A Healthier Sweetener Alternative 🥥
Coconut sugar is a natural, unrefined sweetener that gives the banana cake a light caramel-like flavor while keeping it lower on the glycemic index compared to white sugar.
More nutrients: Contains small amounts of iron, zinc, calcium, and potassium.
Lower glycemic impact: Less likely to cause a rapid spike in blood sugar levels.
Enhances flavor: Adds depth and warmth that pairs beautifully with bananas and cinnamon.
💡 Alternative Sweeteners:
- Honey or maple syrup – For a more natural sweetness and extra moisture.
- Brown sugar – If you prefer a more classic banana cake taste.
- Monk fruit or stevia – For a low-carb or keto-friendly version.
Why These Ingredients Matter
Each of these ingredients plays a key role in making this banana cake healthier, more flavorful, and better in texture. Together, they create a cake that is:
Moist and soft – Thanks to ripe bananas, eggs, and sourdough starter.
Nutrient-dense – Whole wheat flour and coconut sugar add extra fiber and minerals.
Naturally sweet – With less need for refined sugar.
Perfectly balanced in flavor – The sourdough tang complements the bananas’ natural sweetness.
Optional Add-ins – Nuts, Chocolate Chips, Cinnamon, Vanilla Extract
While this sourdough banana cake is already delicious on its own, adding extra ingredients can take it to the next level in terms of flavor, texture, and richness. Whether you love a bit of crunch, extra sweetness, or warm spices, these optional add-ins allow you to customize the cake to your liking.
Let’s explore how each of these ingredients enhances your banana sourdough cake:
1. Nuts – A Crunchy, Nutritious Boost 🥜
Adding nuts gives the cake a pleasant crunch while also increasing its nutritional value. Nuts are rich in healthy fats, protein, fiber, and antioxidants, making them a great way to boost the health benefits of your cake.
Walnuts – A classic banana bread/cake pairing! They add a slightly buttery, earthy flavor and are packed with omega-3 fatty acids.
Pecans – Softer than walnuts, with a mild, caramel-like taste that pairs beautifully with bananas.
Almonds – Provide a firmer crunch and a subtle nutty sweetness.
Hazelnuts – Add a rich, toasty depth that complements the sourdough tang.
💡 Pro Tip: Toast the nuts in a dry pan for 5 minutes before adding them to the batter—this enhances their flavor and makes them even crunchier!
2. Chocolate Chips – A Touch of Decadence 🍫
If you love chocolate and banana together, then adding chocolate chips is an absolute must! The natural sweetness of bananas balances beautifully with the rich, melty goodness of chocolate, creating an indulgent treat.
Dark chocolate chips (70% cocoa or more) – Adds a deep, slightly bitter contrast to the sweetness of the cake.
Milk chocolate chips – Sweeter and creamier, perfect for a more dessert-like cake.
Semi-sweet chocolate chips – A perfect middle ground between dark and milk chocolate.
White chocolate chips – For a sweeter, creamier twist with a hint of vanilla.
💡 Pro Tip: Toss the chocolate chips in a little flour before adding them to the batter—this helps prevent them from sinking to the bottom!
3. Cinnamon – Warmth and Depth of Flavor 🌿
Cinnamon is a simple yet powerful spice that enhances the natural sweetness of bananas while adding a comforting, warm depth of flavor.
Balances the tanginess of sourdough with its warm, slightly sweet aroma.
Enhances the banana flavor, making it more pronounced.
Adds a hint of spice, making the cake even more comforting and cozy.
💡 Alternative Spices:
- Nutmeg – Adds a nutty, slightly spicy warmth (use sparingly!).
- Ginger – Gives a mild, slightly zesty heat.
- Cardamom – Lends a fragrant, floral warmth that pairs well with bananas.
💡 Pro Tip: A teaspoon of cinnamon mixed with a pinch of nutmeg and ginger creates a bakery-style flavor profile!
4. Vanilla Extract – Enhancing Sweetness and Aroma 🌼
Vanilla extract might seem like a small ingredient, but it makes a huge difference in the overall taste of the cake. It enhances the sweetness, aroma, and depth of flavor without overpowering other ingredients.
Balances flavors – Helps bring out the banana’s natural sweetness.
Adds a rich aroma – Makes the cake smell irresistible while baking.
Pairs perfectly with chocolate, nuts, and spices.
💡 Pro Tip: Use pure vanilla extract instead of artificial vanilla for a richer, more natural flavor.
Why These Add-ins Matter
Adding nuts, chocolate chips, cinnamon, or vanilla extract lets you customize your sourdough banana cake to match your personal taste. You can keep it simple and wholesome or make it rich and indulgent—it’s up to you!
For a healthier option. Stick with nuts and cinnamon.
For a more indulgent treat. Go for chocolate chips and vanilla extract.
For a balanced, flavorful cake. Use a combination of all four!
Substitutions & Healthier Options – Greek Yogurt Instead of Butter, Honey Instead of Sugar
One of the best things about homemade sourdough banana cake is that it can be easily adapted to suit different dietary preferences and health goals. Whether you’re looking to cut down on fat, reduce refined sugar, or make the cake even more nutritious, simple ingredient swaps can make a big difference without compromising on flavor or texture.
Here’s a closer look at some smart, healthier substitutions and how they enhance the overall quality of your banana cake:
1. Greek Yogurt Instead of Butter – A Lighter, Protein-Packed Alternative 🥄
Butter adds richness and moisture to banana cake, but if you’re looking for a healthier, lower-fat alternative, Greek yogurt is a fantastic substitute.
Lowers fat content – Greek yogurt has less fat than butter but still keeps the cake moist.
Boosts protein – Adds a good dose of protein and probiotics, making the cake more filling and nutritious.
Enhances texture – Greek yogurt creates a light, fluffy crumb while keeping the cake moist.
Adds a slight tang – This complements the sourdough flavor beautifully.
💡 How to Substitute:
- Replace ½ cup (1 stick) of butter with ½ cup of Greek yogurt.
- Use full-fat Greek yogurt for the best texture.
- If using low-fat yogurt, add a little extra coconut oil or milk to prevent dryness.
💡 Other Butter Alternatives:
- Unsweetened applesauce – Reduces fat while adding natural sweetness and fiber.
- Mashed avocado – A creamy, heart-healthy fat alternative (best for chocolate banana cake!).
- Coconut oil – A plant-based option that keeps the cake rich and moist.
2. Honey Instead of Sugar – A Natural, Less Processed Sweetener 🍯
Traditional banana cake recipes often use refined white sugar, which provides sweetness but lacks nutritional benefits. Swapping it for honey (or other natural sweeteners) makes the cake more wholesome while enhancing the flavor.
More natural & less processed – Unlike refined sugar, honey retains vitamins, minerals, and antioxidants.
Lower glycemic index – Helps prevent blood sugar spikes, making it a better option for balanced energy levels.
Adds moisture & flavor – Honey locks in moisture and adds a light floral or caramel-like taste depending on the variety used.
💡 How to Substitute:
- Replace 1 cup of sugar with ¾ cup of honey (honey is sweeter than sugar, so you need less).
- Reduce the total liquid in the recipe by about 2 tablespoons to adjust for the extra moisture in honey.
- Bake at a slightly lower temperature (325°F/163°C instead of 350°F) to prevent over-browning.
💡 Other Natural Sweetener Alternatives:
- Maple syrup – Adds a rich, deep flavor with additional minerals.
- Coconut sugar – A low-GI option with a mild caramel taste.
- Mashed bananas – For an ultra-natural sweetness boost with extra fiber.
3. Whole Wheat Flour Instead of All-Purpose Flour – A Fiber-Rich Upgrade 🌾
Swapping out refined white flour for whole wheat flour or a 50/50 blend makes your banana cake healthier and more nutritious.
Higher fiber content – Whole wheat flour has more fiber, keeping you fuller for longer.
More nutrients – Rich in B vitamins, iron, and magnesium.
Adds a slightly nutty flavor – Complements the banana and sourdough tang beautifully.
💡 How to Substitute:
- Use 100% whole wheat flour for a more hearty, dense cake (add an extra tablespoon of liquid if needed).
- Use a 50/50 mix of whole wheat and all-purpose flour for a lighter, fluffier texture while keeping the benefits of whole grains.
- If using almond flour for a gluten-free version, combine it with another flour (like oat flour) to maintain structure.
4. Flax Eggs Instead of Regular Eggs – A Vegan-Friendly Option 🥚➡️🌱
If you’re looking for an egg-free version of this cake, flax eggs are an excellent plant-based substitute that still provides binding and moisture.
Great for egg allergies & vegan baking.
Adds fiber & healthy omega-3 fats.
Creates a soft, moist texture without affecting the flavor.
💡 How to Make a Flax Egg:
- Mix 1 tablespoon ground flaxseed with 3 tablespoons of water.
- Let it sit for 5 minutes until it thickens into a gel-like consistency.
- Replace each egg in the recipe with one flax egg.
💡 Other Egg Alternatives:
- Chia egg – Similar to flax eggs, made with 1 tbsp chia seeds + 3 tbsp water.
- Unsweetened applesauce – ¼ cup per egg works well for binding and moisture.
- Mashed bananas – Use ½ banana per egg (best if you want an extra banana flavor boost!).
Why These Substitutions Matter
By making these simple ingredient swaps, you can create a healthier version of sourdough banana cake without sacrificing taste or texture.
Lower in fat – Greek yogurt or applesauce instead of butter.
Lower in refined sugar – Honey, maple syrup, or coconut sugar instead of white sugar.
Higher in fiber – Whole wheat flour instead of all-purpose.
Egg-free & vegan-friendly options – Flax eggs, chia eggs, or mashed bananas.
Whether you’re looking for a lighter treat, a dairy-free alternative, or a more nutrient-packed option, these substitutions let you customize your banana cake to fit your lifestyle.
Step-by-Step Guide to Making Sourdough Banana Cake
Step 1: Preparing the Batter – Mash Bananas, Mix Wet and Dry Ingredients Separately
The first step in making your sourdough banana cake is to prepare the batter correctly. This step is crucial because it ensures a smooth, even texture while allowing all the ingredients to blend properly. Banana cakes are meant to be moist, tender, and flavorful, so following the right mixing method will help achieve the best results.
Let’s break it down into key steps:
1. Mashing the Bananas – The Foundation of Flavor & Moisture 🍌
Since bananas are the main flavor component in this cake, properly mashing them is essential. Overripe bananas (those with plenty of brown spots or fully brown peels) are ideal because they provide natural sweetness and moisture.
✔️ How to Mash Bananas:
- Using a fork: Place the peeled bananas in a bowl and mash them with a fork until they reach a smooth, slightly chunky consistency.
- Using a potato masher: This makes the process quicker and results in a more uniform mash.
- Using a blender or food processor: If you prefer an ultra-smooth batter, blend the bananas for a puree-like texture.
💡 Pro Tip: If your bananas aren’t ripe enough, place them in a warm oven at 300°F (150°C) for 10-15 minutes to soften and enhance their natural sweetness.
2. Mixing the Wet Ingredients – Creating a Smooth, Well-Blended Base 🥄
Once the bananas are mashed, it’s time to combine all the wet ingredients. This step ensures that ingredients like eggs, sourdough starter, and sweeteners are evenly distributed before mixing with the dry ingredients.
✔️ Typical Wet Ingredients in Sourdough Banana Cake:
- Mashed bananas – For natural sweetness and moisture.
- Sourdough starter (or discard) – Adds a mild tanginess and enhances texture.
- Eggs – Provide structure, moisture, and richness.
- Greek yogurt or butter – Helps keep the cake soft and moist.
- Honey, maple syrup, or coconut sugar – Adds sweetness and depth of flavor.
- Vanilla extract – Enhances aroma and brings out the banana’s natural sweetness.
How to Mix Wet Ingredients:
- In a large mixing bowl, whisk the mashed bananas, eggs, sourdough starter, and vanilla extract until well combined.
- Add Greek yogurt (or melted butter) and your sweetener of choice, then mix until smooth.
- Ensure all ingredients are fully incorporated, but avoid overmixing.
💡 Pro Tip: If using melted butter, let it cool slightly before adding it to the mixture to prevent curdling the eggs.
3. Mixing the Dry Ingredients – Ensuring a Fluffy Texture 🌾
The dry ingredients are just as important as the wet ones. Properly combining them ensures even distribution of flour, leavening agents, and spices, preventing lumps and guaranteeing a well-risen cake.
✔️ Typical Dry Ingredients in Sourdough Banana Cake:
- Whole wheat flour (or a blend of flours) – Provides structure and nutrition.
- Baking powder & baking soda – Helps the cake rise and creates a light texture.
- Cinnamon & nutmeg (optional) – Adds warmth and enhances the banana flavor.
- Salt – Balances sweetness and enhances all flavors.
How to Mix Dry Ingredients:
- In a separate bowl, whisk together the flour, baking powder, baking soda, salt, and spices (if using).
- Make sure the leavening agents (baking powder & baking soda) are evenly distributed to prevent uneven rising.
- If adding chocolate chips or nuts, toss them in a little flour before mixing to prevent them from sinking to the bottom of the cake.
💡 Pro Tip: Sifting the dry ingredients can help prevent lumps and create a lighter, more delicate crumb.
4. Why Mix Wet & Dry Ingredients Separately?
Many bakers wonder why it’s necessary to mix wet and dry ingredients in separate bowls before combining them. The answer lies in texture and even mixing:
Prevents overmixing – Overmixing can lead to a dense, tough cake due to excessive gluten development.
Ensures even distribution – Dry ingredients like baking powder and salt get mixed evenly before being added to the wet ingredients.
Creates a tender crumb – Mixing the dry and wet ingredients gently ensures the batter stays light and fluffy.
5. Combining Wet and Dry Ingredients – The Final Step
Once both the wet and dry ingredients are ready, it’s time to gently combine them. This step should be done slowly and carefully to maintain a soft, fluffy texture.
How to Mix the Batter Correctly:
- Gradually add the dry ingredients into the bowl of wet ingredients.
- Use a spatula or wooden spoon to fold the mixture gently—avoid using an electric mixer at this stage to prevent overmixing.
- Mix just until no dry flour patches remain. Some small lumps are fine—overmixing will make the cake dense.
💡 Pro Tip: If using sourdough discard, letting the batter rest for 30 minutes to an hour before baking can help improve flavor and texture. However, if using an active sourdough starter, bake immediately for the best results.
Why This Step Matters
Proper preparation of wet & dry ingredients ensures even mixing.
Mashing the bananas correctly enhances moisture and sweetness.
Separating wet and dry ingredients prevents a dense cake.
Gently folding everything together creates a soft, tender crumb.
By following these simple but essential steps, you’ll create a perfectly moist, flavorful, and fluffy sourdough banana cake every time.
Step 2: Incorporating the Sourdough Starter – How to Mix Without Overworking the Batter
Incorporating the sourdough starter into your banana cake batter is an essential step that imparts that unique tanginess and texture to the cake. However, it’s important to handle the batter delicately during this process, as overworking the dough can result in a dense and tough cake. Here’s how you can mix in your sourdough starter without compromising the light, airy texture that you’re aiming for.
1. What Does the Sourdough Starter Bring to the Cake? 🍞
Before diving into the mixing technique, let’s briefly go over the benefits of adding sourdough starter to the batter:
Mild tanginess – Sourdough starter introduces a subtle tangy flavor, balancing out the natural sweetness of the bananas and adding complexity to the overall taste.
Moisture – The active culture in sourdough helps retain moisture, keeping your banana cake from drying out over time.
Improved texture – The fermentation process gives the cake a lighter, airier crumb. This is especially important for banana cakes, which can sometimes be too dense if not prepared properly.
Probiotics – If you’re using a naturally fermented sourdough starter, it adds healthy probiotics, making the cake not just delicious but also good for gut health.
2. How to Incorporate the Sourdough Starter Correctly 🔄
When it comes to mixing in the sourdough starter, gentleness is key. The goal is to fully incorporate it into the batter without stirring excessively, which would cause the gluten to overdevelop and lead to a heavy cake. Here’s the best method:
Step-by-Step Process:
- Add the sourdough starter to the wet ingredients: After you’ve mashed the bananas, whisked in the eggs, and mixed the other wet ingredients, make a well in the center of the mixture and spoon in your active sourdough starter.
- Mix gently until combined: Use a spatula or wooden spoon to fold the sourdough starter into the wet mixture. Instead of stirring in a circular motion, which can create resistance, gently fold the batter, bringing the wet ingredients from the bottom up over the starter.
- Do not overmix: As you fold, the goal is to combine the ingredients just enough so that the sourdough starter is evenly distributed. There should be no visible lumps of starter left, but the batter should remain light and fluffy with some air pockets.
💡 Pro Tip: Try to keep the mixing to 30-40 seconds after adding the sourdough starter, or until everything is evenly incorporated. The longer you mix, the more gluten will form, which could lead to a tougher texture.
3. Why Not Overwork the Batter?
Overworking the batter after adding the sourdough starter can negatively impact the texture and crumb of the cake. Here’s why:
Gluten development – Overmixing activates the gluten in the flour, leading to a chewy or dense texture rather than the desired light and airy crumb.
Loss of air bubbles – The key to a soft cake is having small pockets of air in the batter, which help the cake rise and keep it moist. Overmixing disrupts these air pockets and can cause the cake to be heavy.
Uneven fermentation – Sourdough relies on fermentation to develop its flavor. Overmixing can disturb this natural process, resulting in a less pronounced tanginess or inconsistent texture.
4. How to Tell if You’ve Mixed the Sourdough Starter Enough?
The best way to determine if you’ve incorporated the sourdough starter correctly is to visually inspect the batter. Here are some signs that you’ve mixed it properly:
The batter should look smooth and uniform, with no clumps of starter visible.
There should still be a light, airy texture with some air bubbles present.
The batter should not be overly runny or stiff—it should flow off the spoon or spatula with a slightly thick, scoopable consistency.
5. Troubleshooting Tips: What if the Batter Feels Too Thick or Thin?
Sometimes, you might notice that the batter is either too thick or too thin after adding the sourdough starter. Here’s what to do in each case:
If the batter is too thick:
✔️ Add a bit more liquid – If the batter feels overly dense, add a tablespoon of milk, water, or a bit more yogurt to loosen it up. Make sure to mix gently after adding.
✔️ Check the sourdough starter’s hydration – If you’re using a very thick starter, it might make the batter a little denser. In that case, you can adjust by adding a little extra liquid (like milk or water) to reach the desired consistency.
If the batter is too thin:
✔️ Add a touch more flour – A tablespoon at a time, add whole wheat flour or your preferred flour to thicken the batter. Mix gently after each addition.
✔️ Check the sourdough starter – If your sourdough starter is too runny or watery (often the case with starter that’s recently fed), this could make your batter too thin. Let the starter sit for a bit to ferment further and reduce excess moisture, or adjust by adding a little extra flour.
6. The Importance of Sourdough Starter in Banana Cake
Incorporating the sourdough starter is not just about flavor—it’s also a crucial part of the baking chemistry that helps the cake rise and maintain a moist, soft texture.
The starter’s live cultures contribute to a more complex flavor profile, giving the cake a unique, slightly tangy note that complements the sweetness of bananas.
The fermentation process in the starter also helps the cake rise more evenly, leading to a fluffier, airier crumb.
Proper incorporation results in a balanced texture—not too dense, not too light—just the right amount of softness and moisture.
Why This Step Matters
Incorporating the sourdough starter properly is essential for achieving the perfect balance of flavor, texture, and moisture in your sourdough banana cake. By following these techniques:
Avoid overmixing to keep the texture light and airy.
Mix gently to preserve air pockets and prevent gluten overdevelopment.
Ensure proper hydration for a batter that is not too thick or too runny.
By gently incorporating the sourdough starter into your banana cake batter, you’ll create a beautifully risen, moist, and flavorfully tangy cake that everyone will love!
Step 3: Baking the Cake – Best Oven Temperature, Baking Time, and How to Check for Doneness
Baking is the final crucial step in the sourdough banana cake process. Getting the oven temperature and baking time just right ensures a golden, moist cake with a fluffy crumb. Overbaking or underbaking can significantly affect the texture and taste, so here’s how to perfect your cake’s baking process and check for doneness.
1. Best Oven Temperature – Ensuring Even Cooking 🔥
The temperature at which you bake the cake has a big impact on the final texture. Too high, and the cake may brown too quickly on the outside while staying raw in the center; too low, and the cake may not rise properly. Here’s the optimal temperature for baking sourdough banana cake:
✔️ Ideal temperature: 325°F (163°C) – This is a slightly lower temperature than traditional cakes baked at 350°F (177°C), which helps to create a moist, tender crumb without overbaking the outer edges. It allows the cake to bake more evenly, giving it time to rise and cook through without burning the top.
✔️ Avoid high heat – Baking at a higher temperature, such as 375°F (190°C), can cause the cake to cook too quickly on the outside, resulting in a dry or tough texture while the inside may still be undercooked.
💡 Pro Tip: If you’re baking multiple cakes or have a larger-than-usual pan, you may need to adjust the temperature slightly. Keep in mind that thicker batters often need lower temperatures for an even bake.
2. Baking Time – Achieving the Perfect Rise and Texture ⏱️
The baking time will depend on the size of your pan and the thickness of the batter. A typical sourdough banana cake bakes in about 45-60 minutes. However, it’s essential to start checking the cake around the 45-minute mark to avoid overbaking.
Standard baking time: 45-55 minutes – For a 9×5-inch loaf pan, the cake usually bakes in this range, but always check towards the end.
For a round cake pan (8-inch or 9-inch): It may bake slightly faster, around 30-45 minutes, because the batter is spread more thinly than in a loaf.
For mini loaf pans or muffin tins: The bake time is generally shorter, ranging from 20-30 minutes depending on the size of the pan.
Factors that Affect Baking Time:
- Pan size and material – Darker pans tend to cook faster than light-colored pans, so adjust the time if using a dark pan.
- Oven type – Convection ovens circulate air, baking cakes a little faster than conventional ovens, so you might need to reduce the time slightly.
- Humidity – Higher humidity levels can require longer baking times, while dry conditions may shorten the time.
💡 Pro Tip: Avoid opening the oven door too frequently while baking, as this can cause fluctuations in temperature that may affect how the cake rises.
3. How to Check for Doneness – Ensuring a Perfect Bake 🔍
There are a few methods to check for doneness to ensure your sourdough banana cake is baked to perfection:
The Toothpick Test
Insert a toothpick or cake tester into the center of the cake.
If it comes out clean or with just a few moist crumbs sticking to it, the cake is done.
If there’s wet batter on the toothpick, the cake needs more time to bake. Continue checking every 5 minutes.
The Touch Test
Gently press the top of the cake with your finger.
If it springs back and feels firm but soft, the cake is done.
If the cake sinks or stays indented, it likely needs more time to set.
Golden Brown Appearance
✔️ The cake’s surface should be a golden brown and may even crack slightly on top.
✔️ You may notice a slight shrinking from the sides of the pan, which indicates the cake has finished baking.
💡 Pro Tip: If the top of the cake begins to brown too quickly before the inside is fully cooked, you can cover the cake with aluminum foil and continue baking until fully done. This prevents the top from burning while the inside finishes baking.
4. Cooling Time – Allow the Cake to Set 🕒
Once your banana cake is done baking, proper cooling is essential to prevent it from becoming soggy or losing its texture. Here’s how to do it properly:
✔️ Let it rest in the pan for about 10-15 minutes after removing it from the oven. This allows the cake to set and makes it easier to remove from the pan without falling apart.
✔️ Remove from the pan – After resting, gently turn the cake out onto a cooling rack to cool completely.
✔️ Cool completely before slicing – Allow the cake to cool fully before slicing into it. Cutting into a warm cake can cause it to lose moisture and affect its texture, leading to a crumbly or mushy cake.
💡 Pro Tip: If you need to speed up the cooling process, you can place the cake in the fridge for a short time (about 15 minutes). Just make sure to let it cool for at least 10 minutes at room temperature before doing so.
5. Why This Step Matters – Ensuring Moisture, Texture, and Flavor
Proper baking is the foundation of a delicious sourdough banana cake. Here’s why this step is essential:
Even baking at the right temperature ensures a tender, moist crumb without overbaking the cake.
The toothpick test and touch test are simple but effective ways to ensure the cake is fully baked without being overdone.
Allowing the cake to cool properly helps set the structure, preventing it from falling apart when sliced.
Step 4: Cooling & Storing – Tips to Keep Your Cake Moist and Fresh
Proper cooling and storing are just as important as the baking process when it comes to maintaining the moisture, texture, and freshness of your sourdough banana cake. If done incorrectly, the cake can become dry or stale quickly. Below are the best practices for ensuring your cake stays moist, delicious, and fresh for longer.
1. Cooling the Cake Properly – Essential for Texture and Freshness 🧊
Once your cake is done baking, cooling is critical to avoid disrupting its structure and flavor. It’s tempting to cut into it right away, but cooling the cake properly helps it set, keeping its crumb texture and moisture intact.
How to Cool the Cake Correctly:
✔️ Rest in the Pan First – After removing the cake from the oven, leave it in the pan for about 10-15 minutes. This allows the cake to finish setting and prevents it from collapsing or becoming too fragile when you remove it.
✔️ Transfer to a Cooling Rack – After the initial rest, gently remove the cake from the pan and transfer it to a cooling rack. A cooling rack allows air to circulate underneath the cake, ensuring that the bottom doesn’t become soggy. If you leave the cake on a flat surface, condensation may form at the bottom, making the cake moist but sticky.
✔️ Cool Completely Before Slicing – Let the cake cool completely at room temperature before slicing. Cutting into a warm cake can cause it to lose moisture and may result in a crumbly or mushy texture. If you’re in a rush, let the cake cool for at least 30 minutes to 1 hour.
💡 Pro Tip: If you need to speed up the cooling process, place the cake in the fridge for about 15-20 minutes once it has cooled down a bit at room temperature. This helps retain moisture and structure while preventing it from becoming overly soft.
2. Storing the Cake – Keeping it Fresh and Moist 🍰
Now that your cake is cooled, proper storage is key to keeping it moist and fresh for days. If stored incorrectly, banana cakes can dry out or absorb odors from the environment, causing the flavor to degrade. Here’s how to store your sourdough banana cake for maximum freshness:
Storing at Room Temperature:
✔️ Cover tightly with plastic wrap or aluminum foil – Wrap the cooled cake in plastic wrap, or place it in a sealed container to lock in moisture and protect it from drying out. Ensure that it’s tightly wrapped to prevent air from getting in.
✔️ Store in a cool, dry place – Keep your wrapped cake in a cool, dry spot on the counter away from heat sources and sunlight. Ideally, it should last 3-4 days at room temperature.
✔️ Avoid storing in the fridge (unless necessary) – Storing cakes in the fridge can cause them to dry out faster due to the cooler, drier air. However, if you live in a hot, humid climate, refrigerating the cake can help prevent spoilage and mold.
Long-Term Storage: Freezing for Freshness ❄️
If you won’t be able to finish the cake within a few days, freezing is a great way to extend its shelf life while preserving its moisture and flavor. Here’s how to freeze your banana cake:
✔️ Wrap tightly – Wrap the whole cake or individual slices in plastic wrap or wax paper. For extra protection, wrap it in aluminum foil as well.
✔️ Use an airtight container or freezer bag – Place the wrapped cake in an airtight container or a freezer bag to protect it from freezer burn and preserve its flavor.
✔️ Label and date – Always label your wrapped cake with the date it was baked so you can keep track of how long it’s been frozen. Cakes can typically be stored in the freezer for up to 2-3 months.
✔️ Thawing – When ready to enjoy the cake, simply remove it from the freezer and let it thaw in the fridge overnight, or on the counter for about 3-4 hours. For faster thawing, you can microwave individual slices for 15-30 seconds on medium heat.
💡 Pro Tip: Freezing slices instead of the entire cake makes it easy to enjoy fresh slices without having to defrost the entire cake. Just pull out a slice when you’re ready to indulge!
3. How to Revive a Dry Cake – Bringing Back Moisture 🌟
If, despite your best efforts, your cake does dry out, there are a few tricks to revive it and bring back its moisture and softness:
✔️ Microwave it with a damp towel – Place the cake slice on a plate and cover it with a damp (not soaking) paper towel. Microwave it for 15-20 seconds. The moisture from the towel will help re-moisten the cake.
✔️ Add frosting or a glaze – If the cake has lost some moisture, adding a generous layer of cream cheese frosting, glaze, or even a little simple syrup can help bring it back to life and make it feel fresh again.
✔️ Serve with fresh fruit or whipped cream – Pairing your cake with something fresh, like sliced bananas, berries, or a dollop of whipped cream, can help counteract any dryness and restore a sense of moistness.
💡 Pro Tip: For an extra burst of moisture, consider drizzling your cake with a flavored syrup (such as simple syrup, honey, or maple syrup) before serving. This adds sweetness and helps keep it from feeling too dry.
4. Why This Step Matters – Keeping Your Cake Moist and Fresh
Storing and cooling your cake properly isn’t just about convenience; it’s about ensuring the long-term quality of your banana cake. Here’s why this step is essential:
Cooling the cake properly helps preserve its texture and moisture, preventing it from becoming soggy or overly dry.
Storing it tightly wrapped helps maintain freshness and prevents it from absorbing external odors or becoming stale.
Freezing the cake for later ensures you can enjoy it at a later date without compromising its flavor or moisture.
Reviving a dry cake with simple tricks can make even a slightly dry cake feel fresh again, extending its shelf life and preventing food waste.
Tips for the Perfect Banana Cake Every Time
Best Bananas to Use – Why Overripe Bananas Make the Best Cake 🍌
When it comes to baking banana cakes, one of the most important ingredients is, of course, the banana itself. But not just any banana will do. Overripe bananas, with their dark spots and soft texture, are the secret to achieving the best flavor, moisture, and texture in your sourdough banana cake. Let’s explore why overripe bananas are the best choice for this recipe and how they impact the overall outcome of your cake.
1. Overripe Bananas = More Sweetness 🍯
Bananas undergo a natural ripening process that causes them to become sweeter over time. As bananas ripen, their starch content is broken down into natural sugars like glucose and fructose. This means that overripe bananas have a higher sugar content than slightly ripe or underripe bananas, which makes them the ideal choice for baking.
✔️ Overripe bananas are naturally sweeter – The sweetness of the bananas in your cake helps reduce the need for additional sugar, making it a more naturally sweetened dessert. This can contribute to a more balanced flavor, especially when paired with the tangy notes of sourdough starter.
✔️ More moisture – Overripe bananas have a much softer, mushier texture, and when mashed, they release more moisture. This moisture not only makes the cake extra moist and fluffy, but also helps the batter bind together better, creating a smooth consistency.
💡 Pro Tip: If you don’t have overripe bananas at hand but want to speed up the ripening process, place your bananas in a brown paper bag for a day or two. If you’re really in a rush, you can even bake them in their peel at 300°F (150°C) for 15-20 minutes until the skins turn dark brown, speeding up the ripening process.
2. Richer Flavor Profile 🌟
Bananas naturally develop a deeper, more complex flavor as they ripen. The process of fermentation that occurs during ripening brings out an intense banana flavor that shines through in the cake, adding depth and richness. Overripe bananas also develop a slight caramelized flavor as their sugars break down, which pairs beautifully with the sourdough starter in your cake.
✔️ Intensified banana flavor – As bananas ripen, the natural flavor intensifies, adding a deeper, more robust taste to your cake. The tangy banana flavor compliments the mild sourness of the sourdough, creating a perfect balance of sweetness and acidity.
✔️ Caramelized notes – The longer the bananas ripen, the more likely they are to develop those caramelized sugar notes, giving your cake a subtle hint of caramel without any added sugar. This rich flavor elevates your cake to another level, making it irresistibly delicious.
💡 Pro Tip: If your bananas are just beginning to ripen but are still slightly firm, you can mash them and leave them to sit for an hour or two before adding them to the batter. This helps develop more flavor and a softer consistency, even if they aren’t technically overripe yet.
3. Better Texture and Consistency 🧁
The texture of your sourdough banana cake is largely influenced by the bananas you use. Overripe bananas have a soft, mushy texture that makes them easy to mash and incorporate into the batter. This helps create a smooth, cohesive batter that doesn’t require as much effort to mix, resulting in a fluffier, moister final product.
✔️ Mushier texture helps bind ingredients – The softer the banana, the easier it is to blend into the batter. This contributes to a moist and tender crumb in the final cake. The mashed banana serves as a binding agent that helps hold the ingredients together, which is especially important when working with sourdough starter.
✔️ Even moisture distribution – Because overripe bananas have a higher moisture content, they ensure that the cake remains moist throughout the baking process. Without the extra moisture that comes from overripe bananas, your cake may end up dry or crumbly.
💡 Pro Tip: If you have overly ripe bananas but they are a little mushy or wet, be careful not to over-mash them. Simply use a fork or potato masher to mash them gently, leaving some texture. The slight chunkiness in the banana mash can add a beautiful texture to the cake.
4. How to Tell When Bananas Are Ripe Enough 🔍
To achieve the perfect balance of flavor and texture, you need to know exactly when your bananas are ripe enough to use. Here’s what to look for:
✔️ Dark spots on the peel – When bananas begin to develop dark spots on the peel, they are reaching the ideal stage of ripeness for baking. While the skin may turn completely brown or black, the banana inside should still be soft and mushy. The more dark spots there are, the sweeter and more flavorful the bananas will be.
✔️ Softness – Overripe bananas should yield to gentle pressure and feel soft when you squeeze them. If they’re firm, they’re not quite ripe enough to bring out their full sweetness and moisture.
✔️ Sweet smell – Fully ripe bananas emit a sweet, aromatic fragrance, which is a sign that they’ve reached peak ripeness and are ready to use in your cake.
💡 Pro Tip: Bananas that are too ripe (blackened or with excess liquid) can be used in smoothies, or frozen for future baking projects. Just peel and place them in a sealed bag in the freezer. You can thaw them later to use in baking, where they’ll lend their natural sweetness and moisture.
5. Why This Matters – Elevating Your Cake to the Next Level
Using overripe bananas in your sourdough banana cake isn’t just a baking hack; it’s the key to achieving a moist, flavorful, and perfectly textured cake. Here’s why it makes all the difference:
Maximized sweetness means you can reduce refined sugar, making the cake naturally sweeter and healthier.
Richer flavor enhances the overall taste of the cake, with caramelized, intense banana notes that complement the sourdough tang.
Moist, tender crumb helps prevent the cake from drying out, ensuring that every slice is soft, fluffy, and delicious.
Incorporating overripe bananas will take your sourdough banana cake from good to irresistibly delicious, and the natural sweetness and moisture make it an ideal choice for any healthy or indulgent baking project.
Getting the Right Texture – Adjusting Flour for Fluffiness 🧁
Achieving the perfect texture in your sourdough banana cake is a delicate balance of ingredients, particularly when it comes to flour. The right flour-to-liquid ratio, along with careful mixing techniques, is crucial to ensure a cake that’s soft, moist, and light and fluffy rather than dense or dry. In this section, we’ll explore how adjusting the type and amount of flour you use can significantly impact the texture of your cake.
1. Choosing the Right Flour – Key to Achieving Fluffiness 🌾
The type of flour you select plays a major role in the texture of your banana cake. Not all flours have the same properties, so knowing how they behave in baked goods will help you decide which is best for your sourdough banana cake.
Whole Wheat Flour vs. All-Purpose Flour
- Whole Wheat Flour: Whole wheat flour is denser and heavier because it retains the bran and germ of the wheat grain. While whole wheat flour offers extra fiber and a heartier texture, it can also make your cake denser. If you prefer a light, fluffy texture, you might consider using a combination of whole wheat and all-purpose flour.
- All-Purpose Flour: This is the go-to choice for most cakes because it has a lower protein content, which results in a more light and airy texture. All-purpose flour is ideal for achieving a fluffier cake without compromising moisture, especially when paired with the natural sweetness and moisture of overripe bananas.
- Cake Flour: If you’re aiming for the softest, fluffiest texture possible, cake flour might be a great option. It has a lower protein content than all-purpose flour, creating a more delicate crumb. If you want your cake to have a finer, more airy texture, cake flour can be used instead of all-purpose flour or in combination with it.
💡 Pro Tip: For a perfect balance between the health benefits of whole wheat flour and the fluffiness of all-purpose flour, try using 50% whole wheat flour and 50% all-purpose flour. This way, you’ll get the nutrition and flavor of whole grains, while maintaining a tender, light texture.
2. Adjusting Flour Quantities – How to Get the Right Consistency ⚖️
The amount of flour you use in your batter is directly linked to the texture of your finished cake. Using too much flour can result in a dense and dry cake, while using too little can make the cake too wet and sticky. Here’s how to ensure you’re using the right amount of flour:
Measuring Flour Correctly
- Spoon & Level Method: One of the most common mistakes in baking is packing flour into your measuring cup. When flour is packed down, it can cause you to use too much flour, leading to a dense texture. To measure flour correctly, spoon the flour into the measuring cup, then level it off with the edge of a knife. This ensures that you’re not using excess flour that could weigh down your cake.
- Weighing Flour: For the most accurate measurement, it’s best to weigh the flour using a kitchen scale. Typically, 1 cup of all-purpose flour weighs around 120 grams. Weighing your ingredients ensures consistency and prevents you from accidentally adding too much flour to the batter.
Adjusting Based on the Batter Consistency
- If the batter is too runny: If your batter seems too wet, the cake could end up dense and flat. Add a tablespoon or two of flour at a time to thicken the batter, but be careful not to add too much. Remember that the mashed bananas provide a lot of moisture, so adjust accordingly.
- If the batter is too thick: On the flip side, if the batter feels too thick to spread into the pan, add a small amount of milk or water to loosen it up. Be sure to do this slowly and in small increments, as you don’t want to overdo it and end up with a batter that’s too runny.
💡 Pro Tip: For an extra boost of fluffiness, you can sift the flour before adding it to the dry ingredients. This aerates the flour and reduces the chance of clumping, allowing the batter to incorporate more easily and resulting in a lighter texture.
3. Using a Combination of Flours for Optimal Texture 🍞
While whole wheat flour has a dense texture, it can still be used in combination with lighter flours to create the ideal balance of fluffiness and moisture. You can try experimenting with the following flour combinations:
- Whole Wheat & All-Purpose Flour: As mentioned earlier, combining these two flours gives you the nutritional benefits of whole wheat while maintaining the lightness of all-purpose flour. This combo allows the cake to remain moist without being too heavy.
- All-Purpose & Cake Flour: This combination is great if you want a very soft, delicate crumb. Cake flour is particularly effective at producing a lighter texture, so pairing it with all-purpose flour results in a cake that has a refined and fluffy texture.
- Gluten-Free Flour Blends: For those looking for a gluten-free option, consider using a gluten-free flour blend that includes rice flour, potato starch, or tapioca flour. Many gluten-free blends also contain xanthan gum or guar gum, which help with texture and structure, allowing the cake to remain tender and light.
💡 Pro Tip: If you decide to experiment with different flour combinations, keep the overall ratio of wet to dry ingredients in mind. Adjusting the flour might require you to tweak the liquid content slightly to maintain the correct batter consistency.
4. How Flour Affects Baking Time and Texture ⏲️
Adjusting the type and amount of flour can also impact the baking time and final texture of your cake. Here’s what to keep in mind:
Thicker Batters
If you use more flour, especially in the case of whole wheat flour, the batter will likely be thicker. Thicker batters tend to take longer to bake through, so you may need to extend the baking time by about 5-10 minutes. Always check the cake with a toothpick or cake tester to ensure that it’s fully cooked before removing it from the oven.
Lighter Batters
On the other hand, lighter batters made with more all-purpose or cake flour may bake faster. Keep an eye on your cake, as it could be done sooner than expected. To avoid overbaking, start checking the cake for doneness around the lower end of the suggested baking time.
💡 Pro Tip: Avoid overmixing your batter after adding the flour. Overmixing can cause the cake to become dense and heavy due to the development of gluten. Mix the ingredients just until they are combined to maintain a light texture.
5. Why Getting the Right Flour Texture Matters
Achieving the right texture in your banana cake is essential for creating a delicious, fluffy, and moist cake. By carefully selecting and adjusting the type and quantity of flour you use, you ensure that the cake’s crumb is tender, light, and perfectly balanced. Using a combination of flours, adjusting based on batter consistency, and being mindful of mixing techniques all contribute to the perfect end result.
Making It More Nutritious – Adding Flaxseeds, Swapping Refined Sugar 🌱
When it comes to making your sourdough banana cake not only delicious but also nutritious, there are several simple swaps and additions you can make to boost the health benefits of this already tasty treat. By incorporating flaxseeds and replacing refined sugar, you can elevate your cake into a guilt-free indulgence that supports overall well-being. Let’s dive into how you can make these easy adjustments while keeping the flavor and texture intact.
1. Adding Flaxseeds – A Superfood Boost 🌾
Flaxseeds are a nutritional powerhouse, packed with omega-3 fatty acids, fiber, antioxidants, and protein, all of which contribute to better health. Incorporating flaxseeds into your banana cake not only enhances its nutritional profile but also adds a subtle nutty flavor and a slightly crunchy texture.
Nutritional Benefits of Flaxseeds
- Rich in Omega-3 Fatty Acids: Flaxseeds are one of the best plant-based sources of omega-3s, which are essential for heart health. Omega-3 fatty acids help reduce inflammation and improve overall cardiovascular function.
- High in Fiber: Both soluble and insoluble fiber are found in flaxseeds, which aid in digestive health and help maintain regular bowel movements. Fiber also promotes satiety, making you feel fuller for longer, which can be helpful for managing weight.
- Antioxidants: Flaxseeds contain powerful antioxidants, including lignans, which have been linked to improved immune function and reduced risk of chronic diseases like cancer.
- Plant-Based Protein: Flaxseeds are a good source of protein, which is essential for muscle repair and maintaining a healthy metabolism.
How to Add Flaxseeds to Your Cake
Flaxseeds can be used in a variety of ways in your banana cake:
- Ground Flaxseeds: For maximum absorption of nutrients, it’s best to use ground flaxseeds instead of whole flaxseeds. Whole flaxseeds can pass through the digestive system without breaking down, meaning you miss out on their health benefits. Ground flaxseeds are easily incorporated into the batter, blending smoothly and adding a slight texture without being overwhelming.
- Flaxseed Meal: If you don’t have ground flaxseeds, you can also use flaxseed meal, which is essentially the same thing but finer in texture. Add about 2-3 tablespoons of ground flaxseeds to your batter, which will not only provide nutrition but also help bind the ingredients together due to their natural gel-like consistency when mixed with liquids.
💡 Pro Tip: To make your cake even more nutritious, you can replace one egg with 1 tablespoon of ground flaxseeds mixed with 3 tablespoons of water. This will give your cake a moist and fluffy texture, while also increasing its omega-3 content.
2. Swapping Refined Sugar – Natural Sweeteners for Healthier Cakes 🍯
Refined sugar is often seen as the main culprit behind many health issues, including weight gain, diabetes, and heart disease. By swapping out refined sugar for more natural, nutrient-dense sweeteners, you can make your banana cake healthier without sacrificing flavor. Here are some healthier sugar alternatives that you can use:
Natural Sweeteners to Consider
- Coconut Sugar: Coconut sugar is made from the sap of coconut palms and contains small amounts of nutrients like iron, zinc, and calcium. It has a lower glycemic index than refined sugar, which means it doesn’t cause the same spikes in blood sugar levels, making it a better option for people with diabetes or those looking to manage their blood sugar.
- Honey: Honey is a natural sweetener that has antioxidants, enzymes, and trace vitamins. It also has a lower glycemic index than refined sugar, providing a gentler energy boost without causing sudden blood sugar spikes. For a healthier alternative to refined sugar, you can swap honey for coconut sugar or regular sugar in equal measure, though it may make the batter a little more moist.
- Maple Syrup: Pure maple syrup is another great natural sweetener that comes with added minerals like manganese, zinc, and calcium. It’s rich in antioxidants and can add a wonderful caramel-like flavor to your cake. Maple syrup has a lower glycemic index than refined sugar, which helps avoid blood sugar spikes. Use it in place of sugar, but keep in mind that it might alter the cake’s consistency slightly due to its higher moisture content.
- Stevia: Stevia is a zero-calorie sweetener derived from the stevia plant. It’s much sweeter than sugar, so you only need a small amount to achieve the same level of sweetness. Stevia is perfect for those who are watching their calorie intake or looking for a sugar-free option, though it may not give the same texture as traditional sweeteners. If using stevia, you may need to add more liquid to compensate for the lack of moisture.
How to Swap Refined Sugar in the Recipe
When swapping refined sugar for a healthier option, here’s how you can adjust the recipe:
- Coconut Sugar: Replace refined sugar with coconut sugar in a 1:1 ratio. Keep in mind that coconut sugar has a slightly darker color, which could affect the final appearance of your cake, but it will add a lovely caramelized flavor.
- Honey: If using honey, reduce the amount by about 1/4 cup for every cup of refined sugar, as honey is sweeter than sugar. You may also need to reduce the flour slightly to account for the added moisture.
- Maple Syrup: Use 1/3 cup of maple syrup for every cup of refined sugar. You may need to decrease the liquid in the recipe by about 2 tablespoons to balance the extra moisture from the syrup.
- Stevia: Because stevia is extremely sweet, you only need a small amount. Typically, 1 teaspoon of liquid stevia is equivalent to about 1 cup of sugar, so adjust to your taste preference.
💡 Pro Tip: When replacing refined sugar with a natural sweetener like honey or maple syrup, be mindful of the baking temperature. Natural sweeteners tend to brown faster than refined sugar, so you may want to lower your oven temperature by about 25°F (14°C) to prevent burning.
3. Combining Both Flaxseeds and Natural Sweeteners for Maximum Benefits 🌿
The combination of flaxseeds and natural sweeteners can significantly enhance both the nutritional value and taste of your banana cake. By using ground flaxseeds for their omega-3s, fiber, and antioxidants, along with a healthier sweetener like coconut sugar or maple syrup, you’re creating a cake that’s not only delicious but also beneficial for your body.
Flavor Profile
- The nutty flavor of flaxseeds pairs wonderfully with the rich sweetness of natural sweeteners like honey or maple syrup, creating a cake that is both complex and satisfying.
- The combination of the banana’s natural sweetness and the gentle sweetness of coconut sugar or maple syrup creates a cake that’s perfectly sweet without being overpowering. The flaxseeds add texture and a slight earthiness that balances out the sweetness.
Healthier Indulgence
- By swapping refined sugar for healthier alternatives, you’re cutting back on empty calories, making your cake a more nutritious treat that supports long-term health.
- The addition of flaxseeds not only boosts the omega-3 and fiber content of the cake, but it also promotes digestive health, making it a great option for those looking to improve their overall nutrition.
💡 Pro Tip: If you want to increase the nutrition even further, you can add chia seeds or hemp seeds alongside flaxseeds to increase the protein and fiber content of your cake.
Conclusion – A Healthier and More Delicious Cake 🎂
Making small tweaks like adding flaxseeds and swapping refined sugar for natural sweeteners can dramatically increase the nutritional value of your sourdough banana cake without compromising on flavor. These simple changes not only make your cake healthier but also give it a unique, nutty depth of flavor and a softer, more moist crumb. Enjoy your healthier, guilt-free banana cake as a nutritious snack or dessert, and feel good about the ingredients that nourish your body!
Frequently Asked Questions (FAQs)
Can I Make This Cake Without Sourdough Discard? 🍰
If you don’t have sourdough discard on hand or simply want to make a banana cake without using it, you can absolutely still bake a delicious, moist, and flavorful cake! While the sourdough starter adds some unique tang and texture to the recipe, there are plenty of alternatives that can help you achieve a soft, tender crumb without sacrificing the final product. Let’s explore some options for making this cake without sourdough discard while maintaining excellent flavor and texture.
1. Replacing Sourdough Discard with Yogurt or Buttermilk 🥛
One of the best substitutes for sourdough discard is Greek yogurt or buttermilk. Both of these ingredients provide the same tangy acidity that sourdough discard does, helping to balance the sweetness of the bananas while contributing to the moistness and fluffiness of the cake. Here’s how to use them in place of sourdough starter:
Greek Yogurt
Greek yogurt has a thick, creamy texture that helps provide a moist, dense crumb. It also adds tanginess similar to sourdough, giving the cake a unique flavor. Here’s how to substitute:
- For every 1/2 cup of sourdough discard, use 1/2 cup of Greek yogurt.
- You may need to add a little extra liquid (such as water or milk) to balance out the thickness of the yogurt. Start with a tablespoon or two and adjust as needed to get the right batter consistency.
- Greek yogurt also boosts the protein content of your cake, making it a more filling option.
Buttermilk
Buttermilk is another great alternative because it adds a similar tangy flavor and ensures that your cake remains light and fluffy. The acidity in buttermilk also reacts with the baking soda to create a nice rise, which is essential for the texture.
- For every 1/2 cup of sourdough discard, use 1/2 cup of buttermilk.
- You may need to reduce the amount of other liquids in your recipe to account for the added moisture from the buttermilk.
💡 Pro Tip: If you don’t have buttermilk on hand, you can easily make your own by adding 1 tablespoon of vinegar or lemon juice to 1 cup of milk and letting it sit for about 5 minutes to curdle. This creates a buttermilk substitute that works perfectly in your banana cake.
2. Using All-Purpose Flour with Baking Powder 🌾
If you want to make a simpler version of the cake without any sourdough flavor at all, you can omit the sourdough discard entirely and instead rely on all-purpose flour and baking powder to provide the structure and leavening needed for a light and fluffy cake. Here’s how to approach it:
How to Use Baking Powder as a Leavening Agent
- Baking powder will replace the role of the sourdough’s natural rise and fermentation properties. It is a leavening agent that helps the cake rise without needing the complex fermentation process.
- If you’re using all-purpose flour instead of whole wheat, the cake will be lighter and fluffier on its own. If you’re still using whole wheat flour, make sure to add enough baking powder to get the rise needed for fluffiness. A good rule of thumb is to use 1 to 1 1/2 teaspoons of baking powder per cup of flour.
Adding Extra Moisture
Without sourdough discard, you might miss some of the moisture and tang that sourdough provides. To replace this, ensure you have a proper balance of wet ingredients. Consider using:
- Mashed bananas (which will add moisture and natural sweetness),
- Greek yogurt, or
- Coconut oil or butter for added fat and moisture.
3. Incorporating Applesauce or Pumpkin Puree 🍏🎃
Another great alternative to sourdough discard is using fruit purees, such as applesauce or pumpkin puree. These ingredients will not only add moisture but also bring natural sweetness and a subtle depth of flavor to the cake. They also contribute to the soft and tender crumb.
How to Use Applesauce or Pumpkin Puree
- Substitute 1/2 cup of sourdough discard with 1/2 cup of applesauce or pumpkin puree.
- These purees add a slightly sweet and fruity flavor, which complements the banana’s natural sweetness and helps make the cake moist without being overly rich.
- Additionally, they add a boost of fiber and vitamins, like vitamin C (from applesauce) or vitamin A (from pumpkin), making your cake even more nutritious.
4. Using a Store-Bought Cake Mix (For a Quick Alternative) 🧁
If you’re in a pinch and don’t have the time or ingredients for a full scratch-made sourdough banana cake, you can use a store-bought cake mix as a shortcut. Simply replace the liquid and eggs in the mix with mashed bananas and any of the healthier ingredients discussed earlier (like Greek yogurt or applesauce).
How to Use a Cake Mix
- Choose a vanilla or banana cake mix to complement the flavor of the bananas in the recipe.
- Add mashed bananas as the main wet ingredient, and mix in a bit of yogurt or applesauce to ensure the cake stays moist and flavorful.
- You can also toss in some ground flaxseeds for an extra boost of nutrition.
While this may not replicate the exact flavor profile of sourdough, it’s a quick and simple way to get a moist, delicious cake without the sourdough discard.
Example Outbound Link:
This link directs readers to a trusted resource where they can learn more about sourdough discard and its various uses, enhancing their understanding of why it’s such a great ingredient in your banana cake recipe. Feel free to replace it with other trusted sources based on your specific content!
5. Creating a More Cake-Like Texture Without Sourdough Discard 🎂
If your main concern is the texture that sourdough discard provides, the key is ensuring that your batter remains light and airy, with enough moisture and rise. You can achieve this by:
- Incorporating eggs: Eggs are crucial for creating structure and helping the cake rise, especially when sourdough discard is omitted. Ensure that you add at least 2 large eggs to the recipe for a rich, fluffy texture.
- **Incorporating a bit of baking soda: If you’re using an acidic ingredient like buttermilk or Greek yogurt, adding a small amount of baking soda (around 1/2 teaspoon) can help activate the acidity, creating a lighter crumb.
How Long Does Sourdough Banana Cake Last? 🍌🎂
One of the key aspects of any cake recipe is knowing how long it stays fresh and tasty after baking. A sourdough banana cake has a few unique qualities, thanks to the bananas and sourdough discard, that affect its shelf life. Generally speaking, this cake is not only delicious but also stays moist and flavorful for a decent period of time. Let’s take a deeper look at how long your sourdough banana cake can last and how you can store it to maintain its freshness.
1. At Room Temperature 🌡️
When it comes to storing your sourdough banana cake at room temperature, you can expect it to last 3-4 days. Due to the moisture from the ripe bananas and the sourdough starter, the cake stays soft and moist longer than cakes made with only flour and sugar.
How to Store at Room Temperature
- Covering: To ensure the cake stays fresh and does not dry out, always cover it tightly. You can place it in an airtight container or wrap it well in plastic wrap or aluminum foil.
- Location: Store it in a cool, dry place on your kitchen counter or in a pantry. Avoid direct sunlight or warm spots, as they can speed up spoilage.
- Moisture Retention: The high moisture content from the bananas and the natural acidity from the sourdough discard help to maintain the cake’s texture and fluffiness over the first few days.
💡 Pro Tip: If you find that the cake starts to lose its moisture after a few days, you can microwave it for about 10-15 seconds to bring back some of its softness before serving.
2. In the Refrigerator ❄️
If you need your sourdough banana cake to last longer than a few days, refrigeration is a great option. Stored in the fridge, your cake can stay fresh for up to 5-7 days. Refrigeration helps slow down the growth of bacteria and mold, but it can cause the cake to lose some of its moisture. However, this can be easily fixed by warming it up in the microwave or oven before serving.
How to Store in the Refrigerator
- Airtight Container: Make sure to store your cake in an airtight container or wrap it tightly in plastic wrap to prevent it from drying out or absorbing any odors from other foods in the fridge.
- Sliced Portions: If you’ve already cut the cake, be sure to cover the exposed edges with plastic wrap or place the slices in a sealed container to prevent them from becoming stale.
💡 Pro Tip: When refrigerating, placing a moist paper towel around the cake can help to retain moisture and keep it from drying out too quickly. Just ensure that the cake is still tightly wrapped to avoid absorbing moisture from the paper towel.
3. Freezing Sourdough Banana Cake ❄️🍰
If you want your sourdough banana cake to last even longer, freezing is an excellent option. A well-wrapped, properly frozen sourdough banana cake can last for 2-3 months without losing much flavor or texture. Freezing the cake is especially useful if you want to bake it in advance for a special event or simply want to enjoy it later.
How to Freeze Sourdough Banana Cake
- Cool Completely: Before freezing, ensure that your cake is completely cooled to room temperature. Freezing a warm cake can create ice crystals and make it soggy once thawed.
- Wrap Tightly: Wrap the entire cake or individual slices tightly in plastic wrap or aluminum foil. For added protection, you can place the wrapped cake in a resealable freezer bag or an airtight container.
- Label and Date: Label the cake with the date so you can keep track of how long it’s been frozen.
Thawing the Cake
- When you’re ready to eat the cake, remove it from the freezer and let it thaw in the refrigerator overnight for best results. If you need it quickly, you can thaw slices in the microwave or at room temperature for a few hours.
- If the cake seems a bit dry after freezing and thawing, you can refresh it by microwaving it for a few seconds or warming it up in the oven. You can also lightly drizzle it with a bit of milk or cream to help restore its moisture.
💡 Pro Tip: To maintain the cake’s freshness, freeze it in individual slices rather than the entire cake. This way, you can take out only the amount you need without having to thaw the entire cake at once.
4. How to Know When Your Sourdough Banana Cake Has Gone Bad 🚨
While sourdough banana cake lasts longer than many traditional cakes, it’s still important to know when it has gone past its prime. Here are a few signs that your cake might be spoiled:
- Mold Growth: If you see any mold on the cake, it’s time to toss it.
- Unpleasant Smell: If the cake starts to smell sour or off, it’s best to discard it. A change in smell is a sign that bacteria have started to grow.
- Dry or Hard Texture: Over time, cakes can dry out, especially if not stored properly. If your cake has become dry and hard despite trying to rehydrate it, it might be best to discard it.
- Discoloration: If you notice any unusual color changes or spots, especially around the cut edges, it may be a sign of spoilage.
💡 Pro Tip: To extend the life of your cake, always store it properly and monitor its condition. You can also consider adding ingredients like lemon juice (in small amounts) or vitamin C powder to extend the shelf life by slowing down the oxidation process.
Conclusion – Enjoying Your Sourdough Banana Cake Fresh and Long-Lasting 🍰
Sourdough banana cake is wonderfully moist, fluffy, and delicious, and with the right storage methods, you can enjoy it for several days or even months! Storing it at room temperature keeps it fresh for up to 4 days, refrigerating it extends its life to 7 days, and freezing it lets you enjoy it up to 3 months. Make sure to store it properly in airtight containers, and keep an eye out for signs of spoilage to get the most out of your cake.
Whether you enjoy it fresh or frozen, sourdough banana cake is a treat that doesn’t just disappear quickly — it keeps giving, so you can savor its flavor for a longer time.
Can I Make It Gluten-Free? 🌾❌
Absolutely! If you need or prefer to make a gluten-free sourdough banana cake, it’s entirely possible to do so while still retaining the moist, tender crumb and delicious flavor. The key is to carefully select your ingredients and make a few adjustments to the recipe to ensure that the cake still rises properly and has the right texture. Let’s dive into how you can easily make your sourdough banana cake gluten-free without sacrificing taste or texture.
1. Choosing the Right Gluten-Free Flour Blend 🌾🔄
To make your sourdough banana cake gluten-free, you’ll need to replace the all-purpose flour or whole wheat flour with a gluten-free flour blend. These blends are typically made from a combination of gluten-free grains and starches that mimic the texture of traditional wheat flour. When using a gluten-free flour blend, it’s important to pick one that is designed for baking so that it offers the proper structure, rise, and texture.
Best Gluten-Free Flours for Baking
Look for a gluten-free all-purpose flour blend that contains a mix of rice flour, tapioca starch, potato starch, and xanthan gum or guar gum. These ingredients work together to give the cake structure, moisture retention, and that soft texture. Some popular gluten-free flour blends include:
- King Arthur Gluten-Free All-Purpose Flour
- Bob’s Red Mill Gluten-Free 1-to-1 Baking Flour
- Cup4Cup Gluten-Free Flour
💡 Pro Tip: Avoid using almond flour or coconut flour alone as a substitute, since these flours don’t have the necessary binding properties and may alter the texture of your cake. If you want to use them, you’ll need to mix them with other gluten-free flours for better results.
2. Binding Agents – The Role of Xanthan or Guar Gum 🧪
One of the challenges of baking gluten-free cakes is achieving the right structure and texture. Gluten is responsible for the elasticity and structure in traditional cakes, so when it’s absent, you may need to add a binding agent like xanthan gum or guar gum to help hold the cake together.
How to Use Xanthan or Guar Gum
- Xanthan gum helps gluten-free cakes rise and gives them a chewy, dense texture. For most gluten-free cakes, you’ll need about 1/4 teaspoon per cup of gluten-free flour.
- Guar gum can also be used as a thickener and binder. It’s similar in function to xanthan gum but may not produce the exact same texture.
If you’re using a store-bought gluten-free flour blend (like the ones mentioned earlier), the blend will likely already contain xanthan or guar gum. However, if you’re using individual gluten-free flours, make sure to add a binding agent to the mix.
💡 Pro Tip: You can also experiment with adding ground flaxseed or chia seeds to provide a bit of extra binding and texture, as they help absorb moisture and improve the structure of the cake.
3. Adjusting the Wet Ingredients – More Moisture and Texture 💧
Gluten-free flours tend to be a bit more absorbent than regular flours, so you may need to adjust the wet ingredients to prevent your banana cake from becoming too dry. You can do this by increasing the amount of liquid or using ingredients that will help keep the cake moist and tender.
How to Add Extra Moisture
- Greek yogurt or buttermilk can be added to keep the cake moist and soft. These ingredients also add a bit of tanginess, which complements the natural sweetness of the bananas.
- Applesauce or pumpkin puree are also great options for adding moisture and tenderness to the cake without affecting the flavor too much. Use about 1/4 cup extra to make up for the increased absorbency of the gluten-free flour.
- Banana puree is already part of the recipe, but you can increase the amount of mashed bananas if you want the cake to be even more moist and flavorful. The natural sugars in the bananas also help the cake stay soft for longer.
4. Using Sourdough Starter in Gluten-Free Baking 🍞
Since the sourdough discard or starter is integral to the recipe, you’ll want to find a gluten-free sourdough starter to keep the tangy flavor and texture intact. You can make your own gluten-free sourdough starter using gluten-free flours, such as brown rice flour or sorghum flour, along with water and a bit of time.
Making Gluten-Free Sourdough Starter
To make a gluten-free sourdough starter, combine gluten-free flour with water and let it ferment for several days, feeding it with more flour and water as needed. This process will create the lactic acid bacteria that give the starter its characteristic tang and leavening properties.
If you don’t want to go through the process of making a gluten-free sourdough starter from scratch, you can buy a pre-made gluten-free sourdough starter from specialized baking stores or online retailers.
💡 Pro Tip: If you don’t want to use a gluten-free sourdough starter, you can replace it with a gluten-free leavening agent (such as baking soda or baking powder) and a bit of apple cider vinegar to mimic the tangy flavor and help the cake rise.
5. Baking Time and Temperature – Adjustments for Gluten-Free Cakes ⏲️
Gluten-free cakes can sometimes require a slightly longer baking time than traditional cakes. This is because gluten-free batters tend to be denser, and the structure may need more time to set properly.
Baking Tips for Gluten-Free Banana Cake
- Oven Temperature: Keep the oven temperature at the same 350°F (175°C) as the original recipe. However, always check for doneness by inserting a toothpick or cake tester into the center of the cake. It should come out clean or with just a few crumbs when the cake is fully baked.
- Baking Time: Your gluten-free banana cake may need about 5-10 minutes longer than the original recipe to bake through fully. Start checking for doneness around the 50-minute mark, but it could take up to 60 minutes depending on your oven and the size of the cake.
- Don’t Overmix: Overmixing gluten-free batter can cause it to become too dense, so gently fold the ingredients together, just like in the regular recipe.
💡 Pro Tip: If the cake starts to brown too quickly on top, you can cover it loosely with aluminum foil halfway through the baking process to prevent burning while allowing the center to finish baking.
6. Taste and Texture – Maintaining Flavor with Gluten-Free Ingredients 🤤
While gluten-free cakes may have a slightly different texture compared to traditional cakes, they can still be incredibly flavorful and delicious. The bananas provide natural sweetness and moisture, while the gluten-free flour blend ensures a soft, crumbly texture that complements the banana flavor.
Balancing Flavor
- The tanginess from the gluten-free sourdough discard (if you choose to use it) will still shine through, giving the cake a unique depth of flavor.
- If the texture feels a bit denser than you’d like, you can try adding a small amount of baking powder (about 1/2 teaspoon) along with the baking soda to give the cake a lighter crumb.
Can I Freeze This Banana Cake? ❄️🍌🎂
Yes, you can definitely freeze your sourdough banana cake, and it freezes surprisingly well! Freezing banana cake is a fantastic way to preserve its freshness for weeks or even months. This method not only allows you to enjoy your cake later, but it can also be a great way to prepare ahead of time if you’re making the cake for a special event or if you simply want to store extra portions for future enjoyment. Here’s everything you need to know to freeze your banana cake properly, ensuring that it stays moist, delicious, and ready to enjoy whenever you want.
1. Freezing Whole Cake vs. Sliced Cake 🍰❄️
You can choose to freeze either the whole cake or individual slices, depending on how much of it you want to thaw at a time. Both methods work well, but each has its own benefits.
Freezing the Whole Cake
- Wrap Well: After the cake has completely cooled, wrap it tightly in plastic wrap to ensure there’s no air exposure, which can lead to freezer burn. Then, wrap it again in aluminum foil for extra protection.
- Freezer Bag/Container: To further protect the cake, place the wrapped cake in a resealable freezer bag or an airtight container. Label it with the date to help keep track of its freshness.
- Preserves Freshness: Freezing the whole cake preserves its moisture and fluffiness. You can simply thaw it when you’re ready to serve, without worrying about portions being dried out.
💡 Pro Tip: If you plan to freeze the entire cake, consider cutting it into portions before wrapping it, so that you can thaw just what you need.
Freezing Individual Slices
- Slice First: If you don’t want to thaw the whole cake at once, consider slicing the cake before freezing. This is especially convenient for smaller households or for those who want to enjoy a slice at a time.
- Wrap Each Slice: Wrap each individual slice in plastic wrap and then place the wrapped slices in a freezer-safe bag or container. This will help keep the slices from sticking together and make it easier to grab just one or two when you want them.
- Portion Control: Freezing slices is also ideal if you’re portioning out the cake for future meals, like as a snack or dessert.
💡 Pro Tip: If you’re freezing slices, try to keep them separated by placing parchment paper between each slice. This will prevent them from sticking to each other, allowing you to take out just the amount you need.
2. Properly Wrapping the Cake for Freezing 🍽️❄️
Proper wrapping is key to making sure your sourdough banana cake maintains its moisture and texture while frozen.
How to Wrap for Freezing
- Plastic Wrap: After the cake has cooled completely to room temperature, use plastic wrap to wrap the entire cake or individual slices tightly. The plastic wrap forms a protective layer around the cake, keeping out air and moisture.
- Aluminum Foil: For added protection, wrap the cake or slices with aluminum foil on top of the plastic wrap. This extra layer helps prevent freezer burn and protects the cake from getting freezer odors.
- Freezer Bag or Airtight Container: After wrapping, place the cake or slices in a freezer-safe bag or airtight container. Make sure to remove as much air as possible before sealing to prevent freezer burn.
💡 Pro Tip: If you’re using a freezer bag, try to use the vacuum-seal option if you have it available. This removes even more air and helps the cake stay fresher for longer in the freezer.
3. How Long Can You Freeze Sourdough Banana Cake? ⏳❄️
Your sourdough banana cake can be safely stored in the freezer for up to 2-3 months. After this time, the texture may begin to degrade, and the flavor may not be as fresh, though it will still be safe to eat.
Optimal Storage Time
- 2-3 Months: For the best taste and texture, try to consume your frozen banana cake within this time frame.
- After 3 Months: The cake may still be edible, but its quality may begin to decline. The cake could dry out, and the flavor might not be as vibrant as when it was freshly baked.
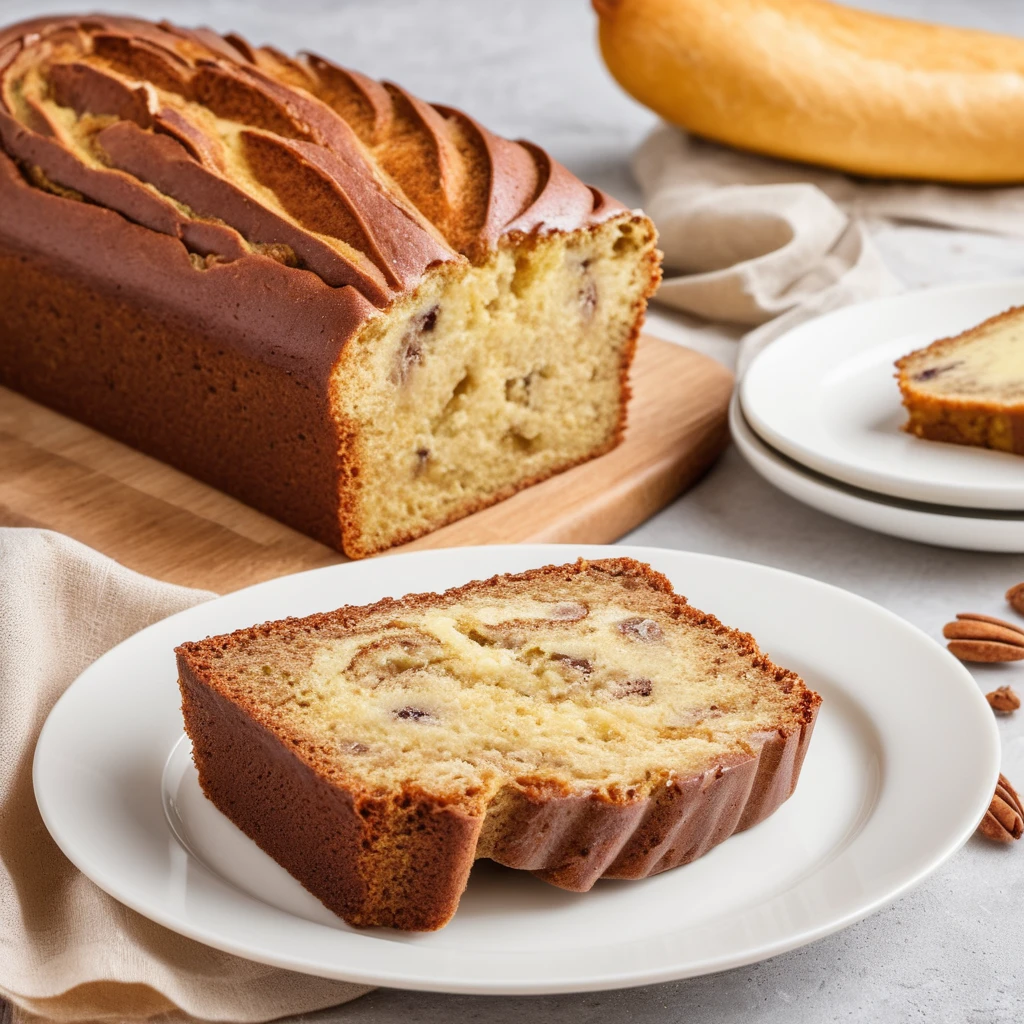
💡 Pro Tip: If you plan to store the cake for a long time, be sure to label the container with the date of freezing to ensure that you use it while it’s still at its best.
4. Thawing and Reheating Your Frozen Banana Cake 🧑🍳🍰
When you’re ready to enjoy your frozen sourdough banana cake, it’s essential to thaw and reheat it properly to maintain the moisture and texture. Here are a few methods to get your cake back to its original delicious state.
How to Thaw the Whole Cake
- Room Temperature: The best way to thaw a whole cake is by leaving it at room temperature for a few hours. Remove the plastic wrap and foil and let it sit on the counter. This method will allow the cake to slowly come back to life without losing too much moisture.
- Refrigerator Thawing: If you need to thaw it more slowly, you can place the wrapped cake in the refrigerator overnight. This works well for cakes that you plan to serve the next day, but it can take a bit longer than room temperature thawing.
- Oven Reheating: After thawing, you can warm the cake in a preheated oven (at 300°F or 150°C) for about 10-15 minutes to bring back its softness. If you prefer, you can also heat individual slices in the microwave for about 10-15 seconds to refresh them.
How to Thaw and Reheat Individual Slices
- Thaw on the Counter: To thaw individual slices, simply place them on a plate at room temperature for 30 minutes to an hour, depending on the size of the slice.
- Microwave for Quick Reheating: If you need a quick snack, pop a slice in the microwave for 10-20 seconds. This will soften the cake and enhance its fresh-baked flavor.
- Oven Reheating: For a slightly crispier exterior, heat individual slices in a preheated oven at 300°F (150°C) for 5-10 minutes, keeping an eye on them to prevent over-drying.
💡 Pro Tip: For an extra touch, you can serve the thawed cake with a dollop of whipped cream, cream cheese frosting, or a drizzle of honey or maple syrup for added flavor.
5. Tips for Freezing and Enjoying Sourdough Banana Cake 🍽️✨
- Avoid Freezing with Frosting: While you can freeze unfrosted banana cake, frosting may not freeze as well, especially if it contains ingredients like cream cheese or whipped cream. If you plan to frost the cake later, do so after it has been thawed and reheated.
- Freeze in Smaller Portions: If you’re unsure how much cake you’ll want at once, freezing individual slices can be a game changer, as you can just grab a piece whenever you’re craving something sweet.
- Don’t Refreeze: Once the cake has been thawed, it’s not ideal to refreeze it, as this can affect the texture and flavor. Try to only thaw as much as you need.
💡 Pro Tip: If you notice the cake has become slightly dry after freezing and thawing, you can bring back moisture by adding a small amount of milk, cream, or even banana puree before reheating.
Conclusion – Enjoy Freshness from the Freezer ❄️🍰
Freezing your sourdough banana cake is a convenient and effective way to extend its shelf life while maintaining its moist and fluffy texture. Whether you freeze the entire cake or individual slices, proper wrapping and storage can help ensure that the cake remains tender, delicious, and fresh for up to 3 months. When you’re ready to enjoy it, simply thaw and reheat the cake, and it will taste just as good as when it was first baked.
By following these steps, you can have a slice of banana cake ready whenever you want a treat, without worrying about it going stale. Happy baking, and enjoy your freezer-friendly banana cake! 🍌🎂
Chef’s Note 🍽️👨🍳
Making this sourdough banana cake is not only a fun and creative way to use up sourdough discard, but it also results in a cake that’s irresistibly moist, fluffy, and packed with flavor. As you experiment with this recipe, feel free to get creative with your ingredients and techniques to make it truly your own.
Here are a few pro tips from the chef to elevate your cake game:
- Banana Quality is Key 🍌: Always opt for overripe bananas for this recipe. The riper the bananas, the sweeter and more moist your cake will be. Their natural sugars will enhance the flavor, making it taste even better!
- Don’t Rush the Cooling Process 🕰️: It’s tempting to dive into a freshly baked cake, but patience is key. Let your cake cool completely before slicing, as it allows the crumb to set properly. This will prevent it from being too crumbly when you cut into it.
- Add a Personal Touch 🧑🍳: Feel free to play around with add-ins like chopped nuts, chocolate chips, or a sprinkle of cinnamon. These ingredients can take the flavor to the next level and add a delightful texture contrast.
- Check Your Sourdough Starter 🍞: If you’re using sourdough discard, be sure it’s still active for the best results. A fresh discard will give your cake that beautiful tangy flavor and help with leavening. If your starter is too old or inactive, it might not rise as well.
- Perfectly Moist Cake with Yogurt or Buttermilk 🥛: For even more moisture and a subtle tang, consider swapping butter with Greek yogurt or adding a bit of buttermilk. This will keep your cake tender and add a rich, velvety texture that melts in your mouth.
- Freeze for Later ❄️: If you have any leftover cake, freezing it is a great option! You can keep your cake for up to 3 months, and it’ll still taste just as delicious after thawing. Just make sure to wrap it tightly to lock in all that goodness.
A Final Word 🌟
Whether you’re baking it for yourself or sharing it with loved ones, this sourdough banana cake is sure to become a staple in your recipe collection. It’s a great way to reduce food waste while enjoying a healthy and delicious treat. Trust the process, enjoy the journey, and savor every bite of this irresistible cake!