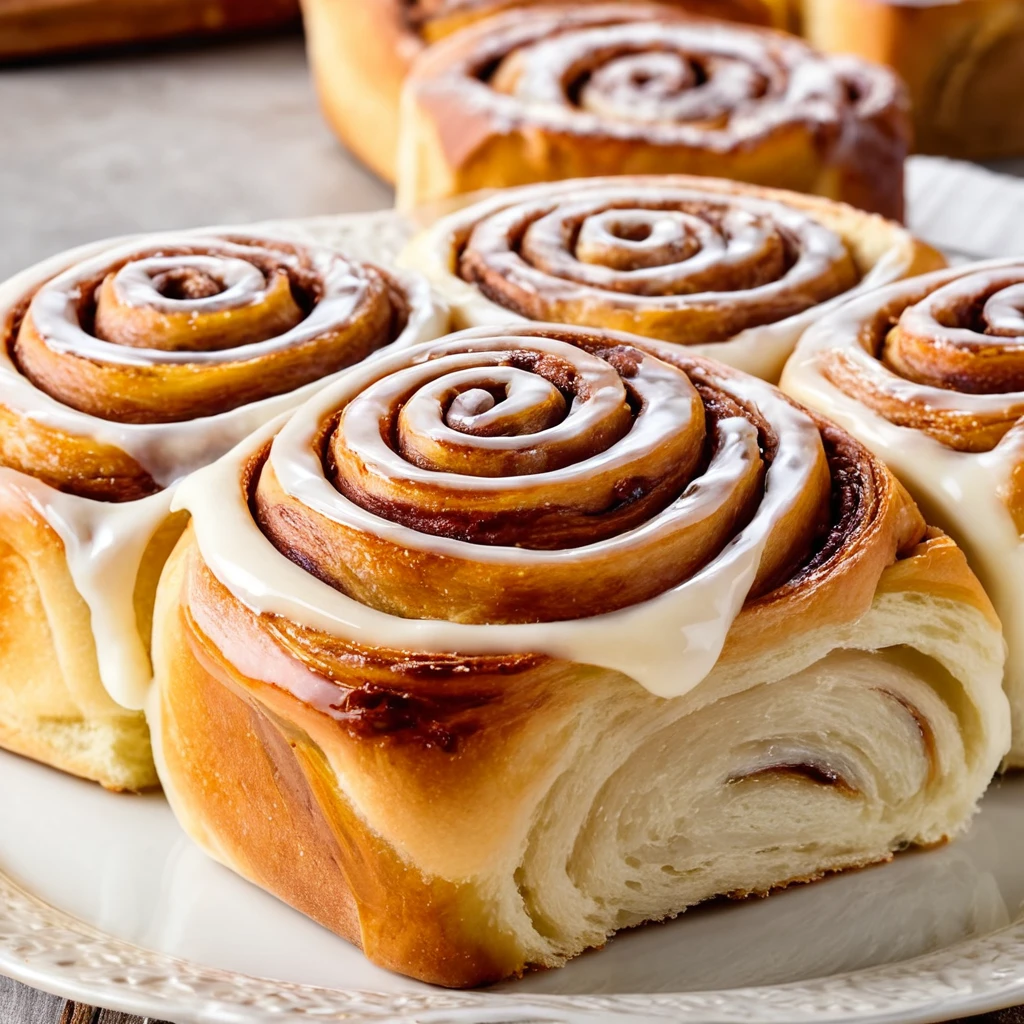
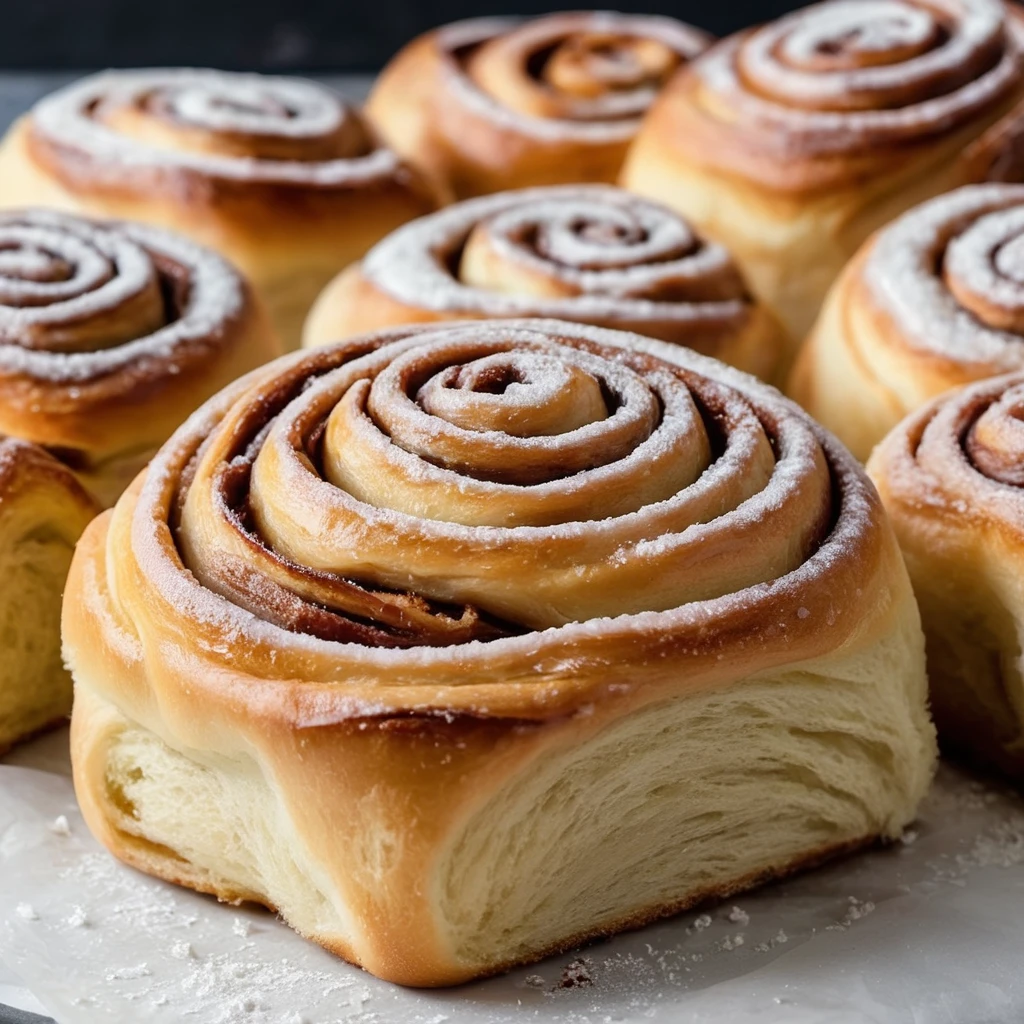
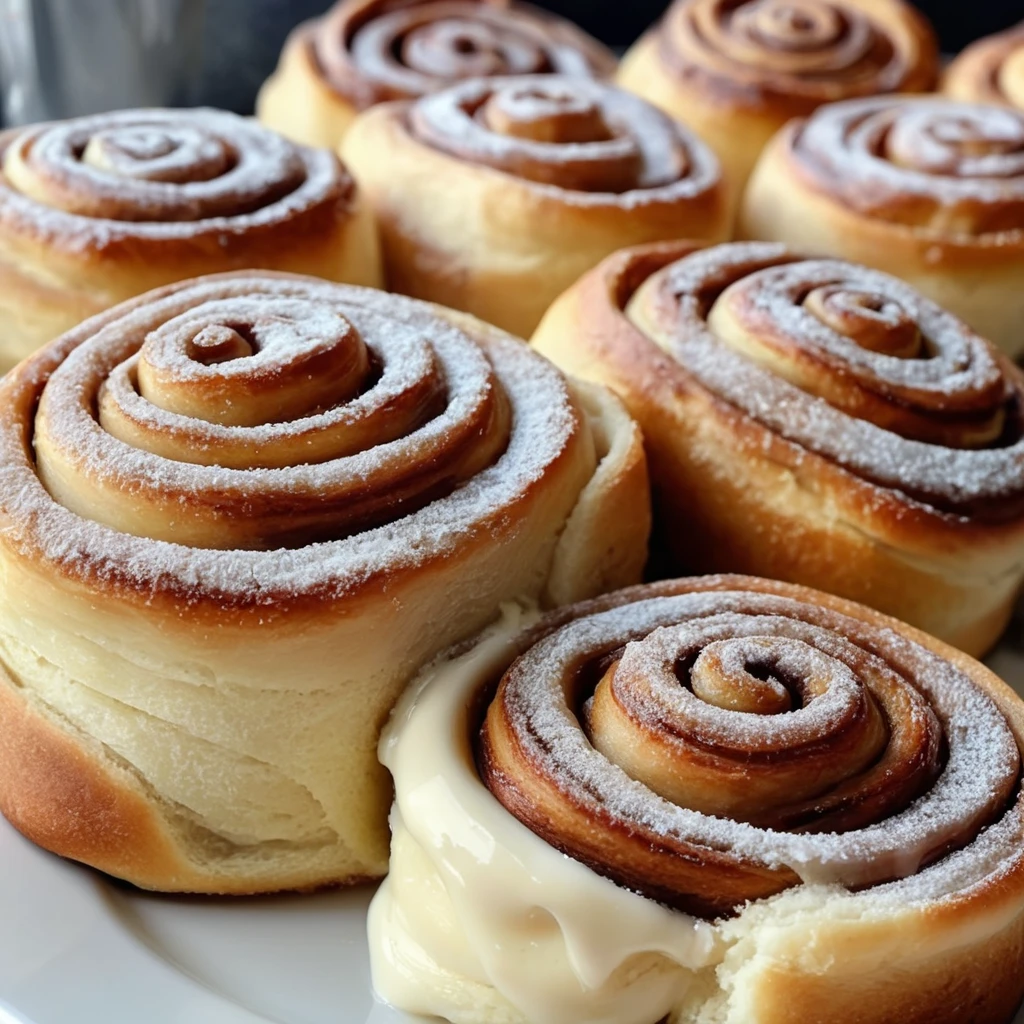
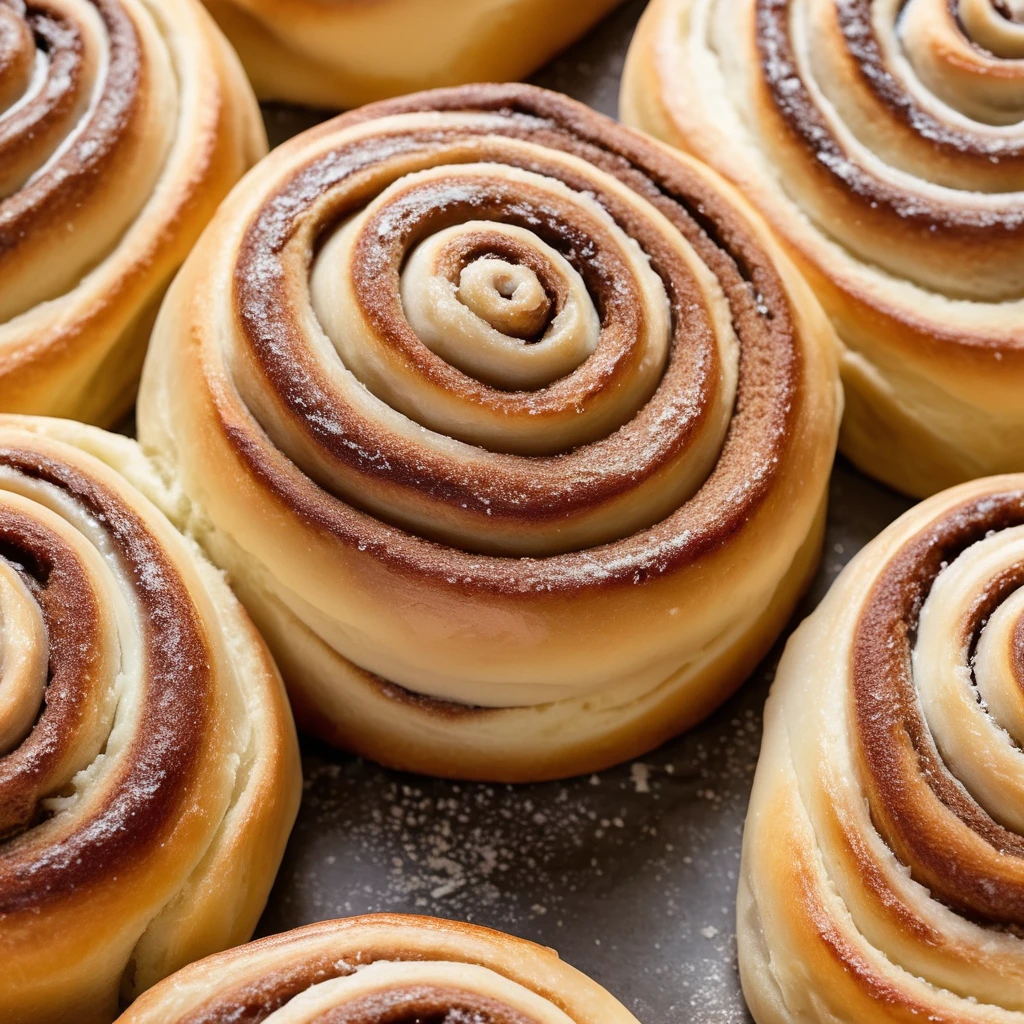
There’s nothing quite like the aroma of freshly baked cinnamon rolls filling your kitchen. But what if you could take this classic treat to the next level? Enter sourdough cinnamon rolls—a delightful twist on the traditional recipe that offers a fluffier texture, a richer flavor, and a subtle tang that balances the sweetness perfectly.
Unlike regular cinnamon rolls that rely on commercial yeast, sourdough cinnamon rolls use a natural sourdough starter for leavening. This not only enhances the depth of flavor but also makes the rolls easier to digest, thanks to the fermentation process. Plus, baking with sourdough allows you to enjoy the benefits of natural probiotics and longer fermentation, resulting in an incredibly soft, pillowy, and delicious treat.
In this guide, we’ll walk you through the best recipe for fluffy and flavorful sourdough cinnamon rolls, covering everything from ingredients and step-by-step instructions to expert tips for achieving bakery-style perfection. Whether you’re a seasoned sourdough baker or just starting your journey, this recipe will soon become your favorite go-to for a sweet, comforting indulgence.
Let’s get baking! 🍞✨
Why Use Sourdough for Cinnamon Rolls?
Fluffy and Tangy Flavor
One of the biggest reasons why sourdough cinnamon rolls stand out from traditional versions is their incredible texture and complex flavor profile. Thanks to the natural fermentation process, these rolls develop a unique balance of sweetness and subtle tanginess, making them more flavorful and satisfying.
The Secret Behind the Fluffiness
The key to achieving soft, pillowy cinnamon rolls lies in the fermentation process. Unlike instant yeast, which works quickly, a sourdough starter ferments the dough slowly, allowing it to develop a better gluten structure. This slow rise helps the dough retain more moisture, leading to a lighter, airier texture. The longer fermentation also breaks down proteins in the flour, making the dough softer and easier to digest.
Some key factors that contribute to fluffiness include:
- Hydration levels: Using the right amount of liquid ensures a well-hydrated dough, which leads to a softer crumb.
- Extended proofing time: A long, slow proof allows air bubbles to develop, creating that signature fluffy texture.
- Proper kneading: Developing gluten correctly ensures that the dough can rise properly without becoming too dense.
A Perfect Balance of Sweet and Tangy
The tangy undertone in sourdough cinnamon rolls comes from the natural acids produced during fermentation. This adds a depth of flavor that cuts through the sweetness of the cinnamon-sugar filling, making each bite more enjoyable and well-rounded.
The fermentation process enhances the overall taste in several ways:
- Lactic acid production: Gives the dough a mild, creamy tang that complements the sweetness.
- Acetic acid production: Adds a slightly sharper tang, which intensifies if the dough is fermented for a longer period.
- Caramelization during baking: The natural sugars in the flour break down and contribute to a rich, golden-brown crust with a deeper flavor.
This delicate balance of flavors makes sourdough cinnamon rolls a next-level treat, offering more than just sweetness—they have complexity, richness, and a slight tang that keeps you coming back for more.
Health Benefits of Sourdough
Sourdough isn’t just about flavor—it’s also packed with health benefits that make it a better choice compared to traditional yeast-based dough. Thanks to the natural fermentation process, sourdough cinnamon rolls are not only delicious but also easier to digest, more nutritious, and better for overall gut health.
Easier Digestion and Gut Health
One of the biggest benefits of sourdough is its positive impact on digestion. Unlike conventional yeast-leavened bread, sourdough undergoes a long, slow fermentation process that helps break down gluten and phytic acid—two components that can be difficult for some people to digest.
- Pre-digested gluten: The natural bacteria in sourdough starter help partially break down gluten, making it easier on the stomach, especially for those with mild gluten sensitivity.
- Reduced phytic acid: Phytic acid, found in grains, can inhibit the absorption of important minerals like iron, calcium, and zinc. The fermentation process in sourdough reduces phytic acid, improving nutrient bioavailability.
- Rich in probiotics: The live bacteria in sourdough (lactic acid bacteria) support gut health by promoting the growth of beneficial gut flora.
Lower Glycemic Index (Better for Blood Sugar Control)
Sourdough has a lower glycemic index (GI) compared to traditional refined bread and pastries. This means it causes slower blood sugar spikes, making it a better option for people looking to balance their blood sugar levels.
- Slower carbohydrate digestion: The fermentation process alters the structure of carbohydrates, slowing their breakdown and absorption.
- Better insulin response: Studies suggest that sourdough may help improve insulin sensitivity, reducing the risk of blood sugar crashes.
More Nutrient-Dense Than Regular Dough
Because of its fermentation process, sourdough cinnamon roll dough is more nutrient-dense than standard cinnamon roll dough. The breakdown of phytic acid and the natural production of organic acids unlock essential minerals and nutrients, making them easier for the body to absorb.
- Higher levels of B vitamins (especially B1, B6, and folate), which help with energy production.
- More bioavailable iron and magnesium, important for overall health and reducing fatigue.
- Increased levels of antioxidants, which help fight inflammation in the body.
Fewer Preservatives and Additives
Since sourdough is naturally preserved through fermentation, it doesn’t require chemical preservatives or artificial additives. This makes homemade sourdough cinnamon rolls a healthier, more natural alternative to store-bought options that often contain stabilizers, artificial flavors, and processed sugars.
Natural Leavening vs. Commercial Yeast
One of the key differences between sourdough cinnamon rolls and traditional yeast-based cinnamon rolls is the leavening agent. While most cinnamon roll recipes use commercial yeast for a quick and predictable rise, sourdough relies on a natural fermentation process using a sourdough starter. This fundamental difference impacts not only the flavor and texture but also the nutritional benefits and digestibility of the final product.
What is Natural Leavening?
Natural leavening refers to the use of a sourdough starter, which is a mixture of flour and water that has been naturally fermented by wild yeast and lactic acid bacteria. This wild fermentation process breaks down the dough more slowly, resulting in a complex, well-developed flavor and a light, airy texture.
Key characteristics of natural leavening:
- Uses wild yeast and lactic acid bacteria instead of commercial yeast.
- Requires a longer fermentation and proofing time.
- Produces a more complex flavor with a subtle tang.
- Creates a softer, more digestible bread with better nutrient absorption.
- Reduces the need for added preservatives due to its natural acidity.
What is Commercial Yeast?
Commercial yeast, such as active dry yeast or instant yeast, is a highly concentrated and fast-acting leavening agent that allows dough to rise in a much shorter time. It was developed for convenience and predictability, making it a popular choice for home bakers and commercial bakeries.
Key characteristics of commercial yeast:
- Contains a single strain of yeast (Saccharomyces cerevisiae) cultivated for rapid fermentation.
- Causes the dough to rise in a few hours rather than overnight.
- Results in a milder, less complex flavor.
- Doesn’t break down gluten and phytic acid as effectively as sourdough.
Key Differences: Flavor, Texture, and Health Benefits
| Feature | Natural Leavening (Sourdough) | Commercial Yeast |
|---|---|---|
| Leavening Agent | Wild yeast + lactic acid bacteria | Cultivated yeast (Saccharomyces cerevisiae) |
| Fermentation Time | 8-24 hours (slow fermentation) | 1-3 hours (quick rise) |
| Flavor | Rich, tangy, deep flavor | Mild, slightly sweet |
| Texture | Soft, fluffy, and moist | Light, but can be drier |
| Digestibility | Easier to digest (gluten breakdown) | Harder to digest for some |
| Glycemic Impact | Lower glycemic index, slower sugar absorption | Higher glycemic index, faster sugar spikes |
| Shelf Life | Stays fresh longer due to acidity | Stales more quickly |
Why Sourdough is Better for Cinnamon Rolls
Using a sourdough starter instead of commercial yeast has several advantages for making cinnamon rolls:
- Richer, More Complex Flavor – The fermentation process gives sourdough cinnamon rolls a slight tang that balances the sweetness of the cinnamon-sugar filling, creating a more well-rounded taste.
- Softer, Fluffier Texture – The extended proofing time allows the dough to develop a lighter and more tender crumb.
- Better for Digestion – Since natural fermentation breaks down gluten and phytic acid, sourdough cinnamon rolls are easier on the stomach, especially for those with gluten sensitivities.
- No Need for Preservatives – The acidity from fermentation naturally preserves the dough, meaning your cinnamon rolls stay fresh longer without artificial additives.
Final Thoughts
While commercial yeast is great for quick and easy baking, natural leavening with a sourdough starter elevates cinnamon rolls to a whole new level. The combination of deep flavor, soft texture, and improved digestibility makes sourdough cinnamon rolls a healthier and more delicious alternative.
Would you like me to add tips on how to convert a yeast-based cinnamon roll recipe into a sourdough version? 😊
Ingredients and Tools You’ll Need
Key Ingredients
The success of your sourdough cinnamon rolls depends on using the right ingredients. Each component plays a crucial role in ensuring the rolls are soft, fluffy, flavorful, and perfectly balanced between sweet and tangy. Below is a breakdown of the key ingredients and why they matter in this recipe.
1. Sourdough Starter (The Natural Leavening Agent)
A mature, active sourdough starter is essential for making sourdough cinnamon rolls. It acts as the natural leavening agent, replacing commercial yeast while adding depth of flavor and a soft texture.
💡 Why It’s Important:
- Provides natural wild yeast and bacteria that ferment the dough.
- Adds a slight tangy flavor that enhances the sweetness.
- Creates a softer, fluffier texture with long fermentation.
- Improves digestibility by breaking down gluten and phytic acid.
📌 Pro Tip: Your starter should be bubbly and active before using it in the dough. If it’s been in the fridge, feed it 4-6 hours before baking to ensure it’s strong and ready to rise the dough.
2. All-Purpose or Bread Flour (The Structure Builder)
Flour provides the dough’s structure and determines how soft or chewy your cinnamon rolls turn out.
💡 Best Options:
- All-Purpose Flour – Makes softer, more tender rolls.
- Bread Flour – Contains more protein, leading to a chewier, slightly firmer texture.
📌 Pro Tip: For extra soft cinnamon rolls, use a blend of all-purpose and bread flour to get the best of both worlds—structure and fluffiness.
3. Whole Milk (For Moisture and Tenderness)
Milk enhances the richness of the dough, making it more tender and moist. It also contributes to a golden-brown crust due to the natural sugars in milk.
💡 Alternatives:
- Buttermilk – Adds extra tanginess and enhances fermentation.
- Plant-Based Milk (Almond/Oat Milk) – Works as a dairy-free option but may slightly alter texture.
📌 Pro Tip: Use warm milk (not hot) to help the sourdough starter activate more efficiently.
4. Butter (For Richness and Flavor)
Butter is essential for creating that buttery, melt-in-your-mouth texture in cinnamon rolls. It adds flavor, softness, and richness to both the dough and the filling.
💡 Best Choice:
- Unsalted Butter – Allows you to control the salt level in the recipe.
📌 Pro Tip: Use room temperature butter for easy mixing. In the filling, use softened butter to spread it evenly over the dough.
5. Eggs (For Structure and Softness)
Eggs enrich the dough, helping create a soft, fluffy, and slightly chewy texture. They also improve the dough’s elasticity and help it rise better.
💡 Why Eggs Matter:
- Add richness and moisture to the dough.
- Help the dough rise higher by strengthening the gluten network.
- Improve the golden color of the rolls.
📌 Pro Tip: Use room temperature eggs for better incorporation into the dough.
6. Sugar (For Sweetness and Browning)
Sugar not only sweetens the dough but also feeds the sourdough starter, helping it ferment and rise properly.
💡 Types of Sugar in This Recipe:
- Granulated Sugar – Light sweetness for the dough.
- Brown Sugar – Used in the cinnamon filling for a deep, caramel-like flavor.
📌 Pro Tip: Brown sugar is best for the filling because it creates a gooey, rich cinnamon swirl. You can also use honey or maple syrup in the dough for extra flavor.
7. Cinnamon (The Star Spice)
Cinnamon is what makes these rolls warm, fragrant, and irresistible. It gives the filling its signature flavor and aroma.
💡 Best Choice:
- Ground Ceylon Cinnamon – Milder, sweeter flavor.
- Ground Cassia Cinnamon – Stronger, spicier, and more intense.
📌 Pro Tip: Use fresh, high-quality cinnamon for the best flavor, as older cinnamon loses its potency.
8. Salt (For Flavor Balance)
Salt is crucial for enhancing all the flavors in the dough and preventing it from tasting bland. It also controls yeast activity, ensuring the dough doesn’t over-rise.
💡 Best Choice:
- Fine sea salt or kosher salt – Dissolves easily into the dough.
📌 Pro Tip: Never add salt directly to the sourdough starter—it can inhibit yeast growth. Mix it with the flour before adding the starter.
9. Heavy Cream (For Extra Soft Rolls – Optional)
Pouring warm heavy cream over the rolls before baking makes them extra soft and gooey. This trick is often used in bakery-style cinnamon rolls.
📌 Pro Tip: Let the heavy cream sit at room temperature before pouring it over the dough to prevent shocking the rolls.
10. Cream Cheese (For the Perfect Frosting)
A classic cream cheese frosting takes these cinnamon rolls to the next level. The tanginess of the cream cheese pairs perfectly with the sweetness of the rolls.
💡 Best Choice:
- Full-fat cream cheese for the creamiest texture.
- Powdered sugar for smooth, lump-free frosting.
📌 Pro Tip: Use room temperature cream cheese for a silky-smooth frosting that spreads easily.
Essential Baking Tools
To achieve perfectly fluffy, flavorful sourdough cinnamon rolls, having the right tools can make all the difference. While you don’t need a professional bakery setup, using essential baking tools ensures a smooth process from mixing the dough to baking the rolls to golden perfection. Below is a list of must-have tools and how they help in creating the best sourdough cinnamon rolls.
1. Digital Kitchen Scale (For Precise Measurements)
Baking is a science, and accurate measurements are crucial, especially when working with sourdough. A digital kitchen scale helps ensure that you use the exact amounts of flour, sourdough starter, water, and other ingredients, leading to consistent results every time.
💡 Why It’s Important:
- Provides more accuracy than measuring cups, especially for flour and sourdough starter.
- Helps maintain the right dough hydration ratio.
- Prevents excess flour from making the dough too dry.
📌 Pro Tip: Always weigh your ingredients in grams instead of using volume measurements for better consistency.
2. Large Mixing Bowl (For Dough Preparation)
A large, sturdy mixing bowl is essential for combining ingredients and letting the dough rest during fermentation. Since sourdough needs a long proofing time, your mixing bowl should be spacious enough to allow the dough to rise without overflowing.
💡 Best Choice:
- Glass or stainless steel bowls are ideal, as they don’t retain odors and are easy to clean.
- Plastic bowls can also work but avoid reactive metal bowls (like aluminum) as they may interfere with the fermentation process.
📌 Pro Tip: Lightly oil the bowl before placing the dough in it to prevent sticking.
3. Bench Scraper (For Handling Sticky Dough)
Sourdough dough is often stickier and more delicate than traditional yeast dough. A bench scraper helps with shaping, folding, and transferring the dough without making a mess.
💡 Why It’s Useful:
- Makes it easier to lift and fold dough during stretch-and-fold steps.
- Helps scrape up any sticky residue from the work surface.
- Allows you to cut dough evenly if you want smaller cinnamon rolls.
📌 Pro Tip: Lightly dust the scraper with flour when working with sticky dough to prevent it from sticking.
4. Rolling Pin (For Even Dough Thickness)
A good rolling pin is essential for rolling out the dough evenly before adding the cinnamon filling. This ensures that your cinnamon rolls have a consistent thickness, allowing for an even rise and bake.
💡 Types of Rolling Pins:
- French-style (tapered) rolling pin – Easier to control and roll dough more smoothly.
- Classic handled rolling pin – Offers a firm grip for better pressure distribution.
📌 Pro Tip: Lightly flour your rolling pin or use parchment paper on top of the dough to prevent sticking.
5. Sharp Knife or Dough Cutter (For Clean Cutting)
Once your dough is rolled out and filled with cinnamon sugar, you’ll need a sharp knife or dough cutter to slice it into even rolls. A clean cut ensures that the rolls hold their shape while baking.
💡 Best Tools for Cutting:
- Dough scraper – Great for slicing soft dough without crushing it.
- Sharp serrated knife – Works well if your dough is firmer.
- Unflavored dental floss – A secret trick for super-clean cuts without squishing the dough.
📌 Pro Tip: If using a knife, use a gentle sawing motion instead of pressing down too hard to avoid deflating the rolls.
6. Baking Dish or Cast Iron Skillet (For Even Baking)
The right baking dish is key to ensuring that your sourdough cinnamon rolls bake evenly and remain soft and fluffy.
💡 Best Options:
- Glass or Ceramic Baking Dish – Distributes heat evenly, keeping the rolls soft.
- Cast Iron Skillet – Creates crispy edges while keeping the center soft.
- Metal Cake Pan – Works well but may bake slightly faster.
📌 Pro Tip: If you like extra gooey cinnamon rolls, place the rolls close together so they bake into each other. If you prefer crispy edges, space them apart.
7. Pastry Brush (For Spreading Butter and Heavy Cream)
A pastry brush is useful for evenly spreading melted butter over the dough before adding the cinnamon filling and brushing heavy cream over the rolls before baking.
💡 Why It’s Helpful:
- Ensures even distribution of butter, egg wash, or cream.
- Helps create a golden, shiny finish on the rolls.
📌 Pro Tip: If you don’t have a pastry brush, use a spoon or clean hands to spread butter evenly.
8. Cooling Rack (For Proper Cooling)
After baking, placing your cinnamon rolls on a cooling rack prevents them from getting soggy on the bottom while they cool.
💡 Why It’s Important:
- Prevents condensation buildup that can make rolls too soft or sticky.
- Cools the rolls evenly for better texture.
📌 Pro Tip: Let the rolls cool for at least 10-15 minutes before adding frosting, so it doesn’t melt too much.
9. Stand Mixer with Dough Hook (Optional but Helpful)
Kneading sourdough dough by hand can be time-consuming. A stand mixer with a dough hook makes the process easier by developing the gluten faster and saving effort.
💡 Best Choice:
- KitchenAid or similar stand mixer – Ideal for kneading sticky sourdough dough without adding too much extra flour.
📌 Pro Tip: If kneading by hand, use the stretch-and-fold method instead of traditional kneading to strengthen the dough without overworking it.
10. Airtight Container (For Storing Your Sourdough Starter and Dough)
Since sourdough requires long fermentation times, having a good airtight container is essential for storing both your starter and proofing dough.
💡 Why It’s Needed:
- Keeps your sourdough starter healthy between feedings.
- Helps the dough rise properly during cold fermentation in the fridge.
📌 Pro Tip: If storing dough overnight in the fridge, lightly grease the container to prevent sticking.
Optional Additions
While traditional sourdough cinnamon rolls are already a delight, adding a few optional ingredients can take them to the next level. Whether you want to enhance the flavor, texture, or presentation, these additions allow you to customize your cinnamon rolls to your personal taste. Below are some of the best optional ingredients and how they can elevate your sourdough cinnamon rolls.
1. Nuts (For Extra Crunch and Flavor)
Adding chopped nuts to the cinnamon filling gives your rolls a delicious crunch that contrasts beautifully with the soft, fluffy dough.
💡 Best Nuts to Use:
- Pecans – A classic choice that pairs perfectly with cinnamon and brown sugar.
- Walnuts – Adds an earthy, slightly bitter contrast to the sweet filling.
- Almonds – Gives a delicate nutty flavor and extra crunch.
- Hazelnuts – Adds a deep, rich flavor, especially when toasted.
📌 Pro Tip: Lightly toast the nuts before adding them to enhance their flavor and crispness.
2. Raisins or Dried Fruit (For a Fruity Twist)
If you enjoy natural sweetness, adding dried fruit can provide little bursts of flavor throughout the cinnamon rolls.
💡 Best Choices:
- Raisins – A classic addition that complements the warm cinnamon flavor.
- Cranberries – Adds a slight tartness that balances the sweetness.
- Chopped Dates – Naturally caramel-like and pair well with brown sugar.
- Dried Figs or Apricots – Offer a chewy texture and rich sweetness.
📌 Pro Tip: Soak the dried fruit in warm water, orange juice, or rum for 10 minutes before adding it to the filling. This prevents them from being too chewy or dry.
3. Chocolate Chips or Chunks (For a Decadent Treat)
Adding chocolate to cinnamon rolls turns them into an indulgent dessert with a gooey, melty surprise.
💡 Best Chocolate to Use:
- Dark Chocolate (70% cocoa or higher) – Balances sweetness with a slightly bitter depth.
- Milk Chocolate – Adds extra creaminess and sweetness.
- White Chocolate – Pairs beautifully with cinnamon for a rich, buttery flavor.
📌 Pro Tip: Sprinkle chocolate on top of the filling before rolling the dough for the best melt and distribution.
4. Citrus Zest (For a Fresh, Bright Flavor)
A touch of citrus zest in the dough or filling can enhance the overall flavor and balance the sweetness.
💡 Best Citrus Options:
- Orange Zest – A classic pairing with cinnamon that adds a fresh, fruity note.
- Lemon Zest – Offers a slightly tart contrast to the rich, sweet filling.
📌 Pro Tip: Mix the citrus zest into the brown sugar-cinnamon filling for an evenly distributed flavor.
5. Caramel or Toffee Sauce (For Extra Gooeyness)
Drizzling caramel sauce over the cinnamon rolls before or after baking adds a rich, buttery, melt-in-your-mouth sweetness.
💡 Options to Try:
- Salted Caramel Sauce – Adds a perfect balance of sweet and salty flavors.
- Toffee Sauce – A richer, buttery option with deep caramelized sugar notes.
- Maple Caramel – A fall-inspired twist using maple syrup instead of regular sugar.
📌 Pro Tip: Drizzle the sauce while the rolls are still warm so it melts into the layers.
6. Espresso Powder (For a Deeper, More Complex Flavor)
A small amount of espresso powder can intensify the cinnamon flavor and add a hint of richness without making the rolls taste like coffee.
💡 Why It Works:
- Enhances the caramel and cinnamon notes.
- Adds a deeper, slightly smoky undertone.
📌 Pro Tip: Add ½ to 1 teaspoon of espresso powder to the cinnamon-sugar filling for a subtle boost in flavor.
7. Cardamom or Other Spices (For a Warm, Spiced Twist)
If you want to elevate the spice profile, consider adding additional spices to the cinnamon filling.
💡 Best Spice Additions:
- Cardamom – A slightly floral, citrusy spice that pairs beautifully with cinnamon.
- Nutmeg – Adds warmth and depth to the filling.
- Ginger – Complements the tangy sourdough flavor.
- Allspice or Cloves – For a more intense, festive spice profile.
📌 Pro Tip: Start with ¼ to ½ teaspoon of additional spices so they don’t overpower the cinnamon.
8. Marshmallow or Cream Cheese Swirl (For a Unique Twist)
Swirling in marshmallow fluff or cream cheese inside the filling adds a creamy, melty texture that makes the rolls even more indulgent.

💡 Why It’s Amazing:
- Marshmallow Fluff – Creates a gooey, sticky center.
- Cream Cheese – Balances sweetness with a slight tang.
📌 Pro Tip: Spread a thin layer inside the dough before rolling it up for an even distribution.
9. Coconut (For a Tropical Touch)
Adding shredded coconut to the filling or topping gives a slight chew and a subtle tropical flavor.
💡 Best Types of Coconut:
- Toasted Coconut – Enhances the nutty flavor.
- Sweetened Shredded Coconut – Adds texture and sweetness.
📌 Pro Tip: Toast the coconut in a dry pan for 1-2 minutes before adding for a deeper flavor.
10. Flavored Frostings or Glazes (For a Custom Topping)
While classic cream cheese frosting is always a favorite, experimenting with different frostings or glazes can change the overall flavor profile of your sourdough cinnamon rolls.
💡 Fun Frosting Ideas:
- Brown Butter Cream Cheese Frosting – A richer, nutty twist on classic frosting.
- Maple Glaze – Made with powdered sugar and maple syrup for a cozy fall flavor.
- Honey Butter Glaze – A simple drizzle made with honey and melted butter.
- Chocolate Ganache – For a truly decadent dessert-like cinnamon roll.
📌 Pro Tip: If you like less frosting, go for a thin glaze instead of thick frosting.
Step-by-Step Guide to Making Sourdough Cinnamon Rolls
Step 1: Preparing the Dough
The foundation of any great sourdough cinnamon roll is a well-prepared dough. Unlike traditional yeast doughs, sourdough dough requires a longer fermentation time, allowing for better gluten development, enhanced flavor, and improved digestibility. In this step, we’ll go through choosing the right ingredients, mixing the dough, kneading, and the initial fermentation process to ensure your cinnamon rolls turn out soft, fluffy, and perfectly tangy.
1. Key Ingredients for the Dough
Before you begin, gather all the necessary ingredients. Each component plays an important role in the dough’s structure and taste.
💡 Basic Ingredients:
- Sourdough Starter (Active & Bubbly): The natural leavening agent that gives the dough its rise and slight tanginess. Make sure your starter has been recently fed and is at its peak activity.
- Flour (Bread or All-Purpose): Bread flour contains more protein, which helps develop gluten, making the dough soft and elastic. You can also use all-purpose flour for a slightly softer texture.
- Milk (Whole or Plant-Based): Adds moisture, richness, and tenderness to the dough.
- Butter (Melted or Softened): Contributes to the dough’s tenderness and enhances flavor.
- Eggs: Improve structure, make the dough more tender, and help with rising.
- Sugar (Granulated or Brown): Provides sweetness and also helps with browning during baking.
- Salt: Balances flavors and strengthens the dough structure.
- Vanilla Extract (Optional): Adds a subtle depth of flavor.
📌 Pro Tip: If you prefer a richer dough, increase the butter and eggs slightly for a more brioche-like texture.
2. Mixing the Dough
Once all ingredients are measured and ready, it’s time to start mixing the dough.
A. Combine the Wet Ingredients:
- In a large mixing bowl, whisk together warm milk, melted butter, eggs, sugar, and vanilla extract until well combined.
- Add sourdough starter and mix until fully incorporated.
📌 Pro Tip: Make sure the milk is lukewarm (not hot) to avoid killing the beneficial wild yeast in the starter.
B. Add the Dry Ingredients:
- Gradually add flour and salt, mixing with a spoon or spatula until a shaggy dough forms.
- If using a stand mixer, use the dough hook attachment and mix on low speed until the ingredients start to come together.
📌 Pro Tip: Start with less flour than the recipe calls for and add more as needed. The dough should be slightly sticky but manageable.
3. Kneading the Dough
Kneading helps develop gluten, which gives the dough its elasticity and structure.
By Hand Method:
- Transfer the dough to a lightly floured surface.
- Knead for 8-10 minutes, using a push-fold-turn motion, until the dough becomes smooth and elastic.
Stand Mixer Method:
- Knead the dough on medium-low speed (speed 2 or 3) for about 5-7 minutes.
- The dough should pull away from the sides of the bowl but still be soft and slightly sticky.
📌 Pro Tip: If the dough feels too sticky, lightly oil your hands instead of adding more flour to prevent a dry dough.
4. Bulk Fermentation (First Rise)
Now that the dough is well-kneaded, it’s time for the first rise, known as bulk fermentation. This step allows the sourdough culture to ferment and develop flavor.
How to Bulk Ferment:
- Place the dough in a lightly greased bowl, covering it with plastic wrap or a damp towel.
- Let it ferment at room temperature (70-75°F / 21-24°C) for 4-6 hours until it doubles in size.
- During the first few hours, perform stretch and folds every 30 minutes to strengthen the dough.
📌 Pro Tip: The fermentation time varies depending on room temperature and the strength of your starter. Colder rooms require longer proofing.
5. Overnight Cold Fermentation (Optional, but Recommended)
For the best flavor and texture, you can extend the fermentation process by refrigerating the dough overnight.
💡 Why Cold Fermentation is Beneficial:
- Enhances the dough’s tangy sourdough flavor.
- Makes the dough easier to roll out.
- Develops a lighter, fluffier texture.
How to Do It:
- After the bulk fermentation, place the dough in the refrigerator for 8-12 hours (overnight).
- The next day, allow the dough to come to room temperature for about 30 minutes before rolling it out.
📌 Pro Tip: Cold dough is easier to handle and shape, making it ideal for rolling out smooth, even cinnamon rolls.
Step 2: Rolling and Filling
Once your dough has completed its first rise or cold fermentation, it’s time to move on to the fun and flavorful step of rolling and filling your sourdough cinnamon rolls. This is where the magic happens—when you roll the dough into a smooth rectangle and generously fill it with cinnamon-sugar goodness. The key to creating soft, fluffy rolls is in how you roll the dough and how evenly you distribute the filling. Below, we’ll walk through each part of this process to ensure your rolls come out perfectly.
1. Preparing the Rolling Surface
Before rolling out your dough, you want to make sure the surface is properly prepared to prevent sticking and ensure an even rollout.
💡 Tips for a Smooth Rolling Process:
- Lightly flour your work surface. Be careful not to over-flour, as this can make the dough dry and tough.
- Use a rolling pin to gently roll the dough into a rectangular shape. If the dough feels too sticky, you can sprinkle a little more flour on top, but be sure to keep it to a minimum.
📌 Pro Tip: If you prefer, you can use parchment paper on top of the dough to prevent sticking and keep things neat, especially if the dough is particularly soft.
2. Rolling Out the Dough
Once the dough is on your work surface, it’s time to roll it out into a flat, even rectangle. This step is crucial to creating evenly shaped cinnamon rolls with consistent layers.
💡 How to Roll the Dough:
- Gently roll the dough with a rolling pin, working from the center outward.
- Roll it into a rectangular shape, approximately 12-14 inches long and 8-10 inches wide (depending on how big you want your rolls).
- Keep the dough as even as possible to ensure that all your rolls are uniform in size.
📌 Pro Tip: If the dough resists rolling or shrinks back, let it rest for 5-10 minutes before continuing. This helps relax the gluten and makes the dough easier to handle.
3. Preparing the Cinnamon Filling
The filling is what brings the signature sweet and spicy flavor to your sourdough cinnamon rolls. The combination of butter, cinnamon, and sugar creates the perfect gooey, flavorful center.
💡 Basic Cinnamon Filling Ingredients:
- Butter (softened or melted): Acts as the base to hold the cinnamon-sugar mixture in place and provides richness.
- Cinnamon: The star ingredient that gives these rolls their signature flavor.
- Sugar (Brown or Granulated): Brown sugar adds a lovely caramel flavor, while granulated sugar offers sweetness and texture.
- Pinch of Salt: Enhances the sweetness and balances the cinnamon’s intensity.
- Vanilla Extract (Optional): Adds depth to the overall flavor.
📌 Pro Tip: Melt the butter before spreading it onto the dough, as it helps the sugar and cinnamon stick more evenly.
4. Spreading the Filling
After preparing the cinnamon-sugar mixture, it’s time to apply the filling to the rolled dough.
💡 How to Spread the Filling Evenly:
- Brush the melted butter evenly over the rolled-out dough, leaving a small border around the edges (about ½ inch).
- In a small bowl, mix together the cinnamon and sugar (add a pinch of salt), and then sprinkle the mixture evenly over the buttered surface.
- Make sure the filling is spread from edge to edge, with no gaps, for consistent flavor in every bite.
📌 Pro Tip: Be gentle when spreading the filling to avoid tearing the dough. If you find the filling clumping, simply sprinkle it lightly in sections, then use your hands to gently spread it.
5. Rolling the Dough into a Log
Now comes the critical part—rolling up the dough to create your beautiful cinnamon rolls. The goal is to have a tight, even roll to ensure your rolls are perfectly shaped and bake evenly.
💡 How to Roll the Dough Neatly:
- Starting from the long edge (the side closest to you), gently begin to roll the dough away from you into a tight log or cylinder shape.
- Keep the roll as tight as possible without squishing the dough or the filling, as this ensures that the rolls will stay intact and maintain their height during baking.
- When you reach the end of the dough, press the seam slightly to seal it closed.
📌 Pro Tip: If the dough is very sticky, lightly oil your hands to prevent sticking while rolling. If necessary, pinch the seam together to keep it intact.
6. Cutting the Rolls
Now that your dough is rolled up, it’s time to cut it into individual rolls. This is a crucial step that will determine the shape and size of your final rolls.
💡 How to Cut the Rolls Neatly:
- Use a sharp knife, serrated bread knife, or dental floss to cut the dough into even pieces. Aim for about 1.5 to 2 inches per roll.
- If using a knife, use a gentle sawing motion to avoid squishing the dough. If using dental floss, slide the floss underneath the dough and pull the ends tightly to cut.
- Arrange the rolls in a greased baking dish or on a parchment-lined baking sheet. For softer rolls, place them close together; for a slightly more crusty edge, space them apart.
📌 Pro Tip: For uniform rolls, lightly measure and mark the dough into equal sections before cutting. This ensures that each roll bakes evenly.
7. Final Proof (Second Rise)
Once your rolls are cut and arranged in the baking dish, it’s time for the second rise. This allows the rolls to puff up and ensures a soft and airy texture when baked.
💡 How to Proof the Rolls:
- Cover the rolls with a clean towel or plastic wrap and let them rise for about 1-2 hours at room temperature.
- The rolls should be puffy and nearly doubled in size. If you gently press a finger into the dough, it should leave a slight indentation but not collapse.
📌 Pro Tip: If you’re in a hurry, you can let the rolls rise in a warm oven by turning it on to the lowest setting for a few minutes, then turning it off and placing the rolls inside to rise.
Step 3: Proofing and Baking
After you’ve rolled and filled your sourdough cinnamon rolls, the next critical step is proofing and baking them. Proper proofing ensures that your rolls rise to their full potential, while baking turns them into the golden, fluffy, cinnamon-filled perfection we all crave. This step requires patience and attention to detail, but with a little know-how, you’ll be able to achieve light, airy rolls with a soft, tender crumb and a deliciously crisp, caramelized crust. Let’s walk through the best practices for proofing and baking your sourdough cinnamon rolls.
1. Proofing the Rolls (The Second Rise)
Proofing is the final stage of fermentation before the rolls go into the oven. The goal here is to allow the dough to fully rise, becoming puffy and airy. This step ensures your rolls are light and tender, with a slight tang from the sourdough starter.
How to Proof the Rolls Properly:
- Cover the Rolls:
- Once your cinnamon rolls are cut and arranged in a baking dish or on a baking sheet, cover them loosely with a clean kitchen towel or plastic wrap. The cover will help trap moisture and heat, allowing the rolls to rise without drying out.
- Allow Time for Proofing:
- Let the rolls rise for about 1-2 hours at room temperature (70°F/21°C). During this time, they should double in size and become noticeably puffier.
- For a more relaxed proofing, you can also proof them in the refrigerator overnight if you prefer a longer fermentation (this method will also enhance the sourdough flavor).
- Check the Rolls:
- The rolls are ready for baking when they’ve almost doubled in size. You can check by gently pressing your finger into the dough; if it leaves a slight indentation and doesn’t spring back immediately, the rolls are sufficiently proofed and ready for the oven.
📌 Pro Tip: If your kitchen is on the cooler side, try proofing the rolls in an unheated oven with a bowl of warm water placed below them to create a slightly warmer, humid environment for better rise. Alternatively, turn the oven on to its lowest setting for a few minutes, then turn it off and let the rolls rise inside.
2. Preheating the Oven
Before you pop your cinnamon rolls in the oven, it’s important to have the oven properly preheated to ensure an even bake. The right oven temperature ensures the rolls bake through without becoming dry or overcooked.
How to Preheat the Oven:
- Preheat your oven to 375°F (190°C). This temperature is ideal for achieving a golden, crisp exterior while still keeping the interior soft and tender.
- For a crispier crust, you can bake the rolls at 400°F (200°C) for the first 5 minutes, then lower the temperature to 350°F (175°C) for the remainder of the baking time.
- If you have a convection oven, you can lower the temperature by 25°F (about 10°C) since convection ovens cook more efficiently by circulating hot air.
📌 Pro Tip: Place the rolls in the center of the oven to ensure even heat distribution on all sides.
3. Baking the Rolls
The baking process is where the cinnamon rolls get their golden color and that irresistible, comforting aroma. It’s important to watch the rolls carefully towards the end of baking to avoid over-browning or undercooking.
How to Bake the Cinnamon Rolls:
- Place the Rolls in the Oven:
- Once your rolls are proofed, transfer the baking dish to the center rack of the preheated oven.
- If you’re using a baking sheet, you may want to rotate it halfway through the baking time to ensure even browning.
- Bake for the Right Amount of Time:
- The typical baking time for sourdough cinnamon rolls is about 20-30 minutes at 375°F (190°C), but this can vary based on your oven and the size of the rolls.
- You’ll know the rolls are done when the tops are golden brown, and the cinnamon-sugar filling is bubbling around the edges.
- If you’re unsure, you can insert a toothpick or skewer into the center of one of the rolls. If it comes out clean or with just a few moist crumbs, the rolls are fully baked.
- Watch the Rolls Towards the End of Baking:
- Check the rolls at the 18-20 minute mark to ensure they don’t brown too quickly. If they are browning too fast but are not yet fully baked, cover the rolls loosely with aluminum foil and continue baking.
📌 Pro Tip: If you want an even crisper crust, you can brush the tops with melted butter just before baking or towards the last 5 minutes of baking. This creates a beautifully glossy finish.
4. Cooling the Rolls
After your rolls are done baking, it’s tempting to dive in right away, but giving them a few minutes to cool will ensure they maintain their structure and flavor.
How to Cool the Rolls:
- Let Them Rest for a Few Minutes:
- Once the rolls are golden and baked through, remove them from the oven and let them cool in the baking dish for about 5-10 minutes. This allows the filling to set slightly and makes it easier to frost and cut the rolls without spilling out the filling.
- Remove from the Dish:
- After resting, gently remove the rolls from the baking dish and let them cool further on a wire rack if you prefer a firmer base. If you like your cinnamon rolls soft and gooey at the bottom, you can leave them in the pan.
- Frost or Glaze While Warm:
- For the best results, apply your cream cheese frosting, glaze, or icing while the rolls are still slightly warm. The warmth helps the frosting melt slightly and soak into the rolls for a more decadent, gooey texture.
📌 Pro Tip: If you’re glazing the rolls, make sure to drizzle the frosting generously over the rolls to enhance the flavor and create a beautiful finish.
5. Final Tips for Perfect Cinnamon Rolls
- Rotate the Pan: If you want an even bake, remember to rotate the pan halfway through the baking time to prevent any hot spots in your oven.
- Do a Visual Check: Pay attention to the edges of the rolls. They should be golden and firm, but the centers should look slightly soft. If the center seems too doughy, let it bake a little longer, but watch the edges so they don’t burn.
- Bake to Golden Perfection: The rolls should be golden brown on top but not overly dark. The perfect roll has a crisp exterior and a pillowy, soft interior.
- Serve Immediately or Store Properly: Fresh, warm cinnamon rolls are the best, but you can also store them at room temperature, covered, for 1-2 days or refrigerate them for up to a week. To reheat, simply place them in a low-temperature oven for a few minutes until warm.
Tips for the Best Sourdough Cinnamon Rolls
How to Get a Soft and Fluffy Texture
Achieving the perfect soft and fluffy texture in sourdough cinnamon rolls is a combination of technique, timing, and the right ingredients. The beauty of sourdough lies in its slow fermentation process, which enhances both flavor and texture. However, there are several key factors that contribute to ensuring your cinnamon rolls turn out light, airy, and melt-in-your-mouth soft. Let’s break down the steps to ensure that your sourdough cinnamon rolls have that fluffy, tender crumb you crave.
1. Use the Right Flour
The type of flour you choose has a significant impact on the texture of your dough. High-protein flours, such as bread flour, are ideal for sourdough cinnamon rolls because they provide the structure necessary for the dough to rise while maintaining softness. The extra protein content helps with the development of gluten, which gives the dough its elasticity and airy structure.
How Flour Affects Texture:
- Bread flour has a higher protein content (around 12-14%) than all-purpose flour, helping your dough rise higher and resulting in a chewier, fluffier roll.
- If you prefer a softer roll, you can mix bread flour with a small amount of all-purpose flour to balance the elasticity and tenderness.
📌 Pro Tip: If you’re aiming for an ultra-soft crumb, consider using high-gluten flour or a blend of bread flour and cake flour to create a more tender texture while still maintaining the structure needed for a fluffy roll.
2. Proper Hydration of the Dough
Hydration refers to the amount of liquid you incorporate into the dough, and it plays a crucial role in achieving a soft, airy texture. The higher the hydration, the softer the dough becomes. If your dough is too dry, it will be dense and stiff, while properly hydrated dough results in a lighter and fluffier final product.
How to Achieve Proper Hydration:
- When mixing the dough, aim for a slightly sticky consistency. The dough should feel moist but not overly wet.
- Don’t be afraid of stickiness! A bit of stickiness helps achieve a softer texture, as it allows the dough to stretch more easily during proofing and baking.
- If the dough feels too dry, you can add small amounts of water or milk (in teaspoon increments) to increase hydration.
📌 Pro Tip: If you’re using a stand mixer, allow the dough to mix and knead for several minutes. This will help the ingredients fully hydrate and give the dough time to come together. The longer the dough mixes, the softer it will become due to better gluten development.
3. Knead the Dough Properly
Kneading plays a critical role in building gluten, which provides the structure needed for the dough to rise while maintaining a light, airy texture. Over-kneading or under-kneading can affect the final product, so it’s essential to find the right balance.
Proper Kneading Technique:
- Knead the dough until it becomes smooth and elastic. You should be able to stretch it without it tearing. Typically, 8-10 minutes by hand or 5-7 minutes in a stand mixer is ideal.
- While kneading, you want to incorporate as much air into the dough as possible to develop the gluten network while maintaining the moisture.
📌 Pro Tip: After kneading, test the dough by performing the windowpane test: Take a small piece of dough and gently stretch it between your fingers. If it forms a thin, translucent membrane without tearing, your dough has been kneaded properly.
4. Allow for Long Fermentation
One of the secrets to getting a soft and fluffy texture is giving your dough ample time to rise. Longer fermentation (both bulk fermentation and the second rise) allows the dough to develop more flavor, structure, and an airy texture. The slow fermentation process also helps the dough retain moisture, preventing it from becoming too dry.
Bulk Fermentation (First Rise):
- Allow the dough to ferment for 4-6 hours at room temperature, or refrigerate it for a long, slow rise overnight. The longer fermentation period leads to a lighter and more flavorful dough.
- Perform a stretch and fold technique every 30 minutes during the first 2-3 hours of fermentation to strengthen the gluten.
Second Rise (Proofing):
- The second rise, after the rolls have been shaped and filled, is just as important. This step should last about 1-2 hours, allowing the rolls to puff up and create air pockets.
- If the dough feels overly stiff, let it rest for 10-15 minutes, then proceed with the rise. This will allow the gluten to relax and make the dough easier to shape.
📌 Pro Tip: If you’re in a rush and can’t do an extended fermentation, use a warm spot (like a turned-off oven with the light on) to encourage quicker rising. However, always keep in mind that longer fermentation provides superior texture and flavor.
5. Don’t Overproof the Dough
Overproofing happens when the dough is left to rise too long, causing it to lose its structure and become overly airy, resulting in rolls that may collapse during baking. This can lead to dense, flat cinnamon rolls instead of the fluffy, tall rolls you’re aiming for.
How to Avoid Overproofing:
- Watch the dough closely during the second rise. When the rolls have nearly doubled in size and feel light to the touch, they’re ready to go in the oven.
- If you gently press a finger into the dough, it should leave a slight indentation but not deflate completely.
📌 Pro Tip: If you’re unsure whether your rolls are overproofed, perform the poke test. If the dough springs back immediately after pressing, it needs more time to rise. If the indentation stays, it’s overproofed and should be baked right away.
6. Baking at the Right Temperature
The baking process plays a significant role in achieving the perfect texture. Baking the rolls at the correct temperature ensures that they rise and bake evenly, with a light, fluffy interior and a beautiful golden-brown crust.
Optimal Baking Conditions:
- Preheat the oven to 375°F (190°C) for a crisp exterior and a soft, tender interior.
- If you want a slightly crispier crust, you can bake them for the first 5-10 minutes at 400°F (200°C), then reduce the temperature to 350°F (175°C) for the remaining baking time.
- Bake the rolls for 20-30 minutes, checking for golden-brown tops and a bubbly, caramelized filling.
📌 Pro Tip: For a softer texture, you can place a small dish of water on the oven floor while baking. This creates steam, helping to keep the rolls moist while baking.
7. Let the Rolls Rest After Baking
After baking, it’s important to let the rolls rest for a few minutes before you dive in. This allows the steam inside to settle and helps the rolls keep their structure.
How to Rest the Rolls:
- Let the cinnamon rolls cool in the pan for about 5-10 minutes before frosting or serving. This allows the filling to set slightly and makes it easier to cut.
- If you want to serve warm, microwave them briefly (about 20-30 seconds) or place them in a low oven until heated through.
📌 Pro Tip: Allowing the rolls to rest before serving also gives you the chance to apply frosting or glaze, which will soak in slightly, adding to the overall texture.
Common Mistakes to Avoid
When making sourdough cinnamon rolls, even small mistakes can significantly impact the final result. From dense rolls to underdeveloped flavors, knowing what to avoid during the mixing, rising, and baking processes will help you create the perfect soft and fluffy cinnamon rolls. Here’s a closer look at some of the most common mistakes people make and how to avoid them:
1. Not Using Enough Starter
One of the biggest mistakes you can make when baking sourdough cinnamon rolls is not using enough sourdough starter. Since sourdough relies on wild yeast to rise, having a sufficient amount of active starter is essential for a good rise and flavor.
Why It’s Important:
- Too little starter means your dough won’t have enough active yeast to rise properly, leading to dense, heavy rolls.
- Not enough starter can also impact the flavor, as the dough will miss out on the characteristic tanginess that sourdough brings.
How to Avoid This Mistake:
- Ensure your sourdough starter is active and bubbly before using it. If it’s not active, your rolls may not rise as expected.
- Stick to the recommended amount of starter in your recipe. If you’re experimenting, remember that adding too little starter can result in flat or under-flavored rolls.
📌 Pro Tip: To test if your starter is ready, perform the float test: Take a spoonful of starter and drop it in a glass of water. If it floats, it’s active and ready to use.
2. Using Cold Ingredients
Cold ingredients can slow down the fermentation process, which may result in dough that doesn’t rise as expected. In sourdough cinnamon rolls, the warmth of the dough plays a crucial role in both flavor development and texture.
Why It’s Important:
- If the milk, butter, or eggs are too cold, the dough will be stiff and may not knead properly, leading to poor gluten development and a dense final product.
- Cold ingredients can also interfere with the activation of your sourdough starter, as it needs warmth to ferment and rise effectively.
How to Avoid This Mistake:
- Warm up your milk, water, and butter before mixing them into the dough. You can heat the milk to lukewarm (around 95°F/35°C) and melt the butter before adding it to the dough.
- Let your eggs come to room temperature before adding them. Simply place them in a bowl of warm water for about 5-10 minutes if you forget to take them out in advance.
📌 Pro Tip: If you’re using a stand mixer, make sure the dough hook attachment is set up and the bowl isn’t too cold. If it is, it can cause the dough to tighten up too quickly.
3. Under or Over-Kneading the Dough
Kneading the dough is a delicate process. While it’s essential to knead enough to develop the gluten, over-kneading can result in tough, chewy rolls that aren’t as fluffy as you want.
Why It’s Important:
- Under-kneading means the dough won’t have enough gluten structure to rise properly, leading to dense, flat rolls.
- Over-kneading can cause the dough to become too tight, reducing its ability to rise and leading to rolls that are tough and chewy rather than light and airy.
How to Avoid This Mistake:
- Knead the dough until it’s smooth and elastic, and passes the windowpane test (when a piece of dough can be stretched thin without tearing).
- Don’t overdo it; if the dough is smooth and soft after a few minutes, it’s ready. Keep an eye on it, and if it’s sticking too much, try using a little bit of flour to prevent it from sticking to your hands or countertop.
📌 Pro Tip: If you’re using a stand mixer, knead for about 5-7 minutes on medium-low speed. You can also do the stretch and fold technique during the first rise to avoid overworking the dough.
4. Not Proofing the Dough Long Enough
Proofing is a crucial step in the process of making cinnamon rolls, and underproofing or rushing through it can lead to dense, flat rolls. Proper proofing allows the dough to rise and develop flavor, making the rolls light and airy.
Why It’s Important:
- If you don’t allow enough time for the dough to rise, the rolls will be underproofed, resulting in dense, unrisen rolls.
- Underproofing also prevents the flavors from developing fully, leaving the rolls less flavorful.
How to Avoid This Mistake:
- Allow the dough to rise for the recommended amount of time during both the bulk fermentation (first rise) and the proofing (second rise) stages.
- Make sure the dough is at a warm, draft-free place while proofing. If you’re in a cold environment, use an oven with a light on, or place the dough near a heater, but not directly on a hot surface.
📌 Pro Tip: If you’re using the overnight proofing method, ensure the dough has enough time to rise in the fridge, and then let it sit at room temperature for about 30 minutes to an hour before baking.
5. Skipping the Rest Time After Rolling
After you’ve rolled out your dough and added the filling, it’s tempting to dive straight into cutting and baking. However, skipping the rest time after rolling and before cutting can result in misshapen rolls and improper filling distribution.
Why It’s Important:
- Allowing the dough to rest before cutting helps the gluten relax, making it easier to slice and preventing the dough from resisting the cutting process.
- Skipping this step may cause the rolls to be unevenly shaped, which can lead to some rolls being underbaked and others overbaked.
How to Avoid This Mistake:
- After rolling and filling the dough, let it rest for 10-15 minutes before cutting into individual rolls. This helps the dough relax and makes it easier to work with.
📌 Pro Tip: After resting, use a sharp knife or floss to cut the rolls neatly. A sharp knife prevents squishing the rolls, while dental floss will help you cut through the dough cleanly without damaging the shape.
6. Overbaking or Underbaking the Rolls
The balance between underbaking and overbaking is crucial when it comes to cinnamon rolls. Underbaking can result in doughy centers, while overbaking can dry out the rolls and make them tough.
Why It’s Important:
- Underbaking leaves the center of the rolls raw and doughy, while overbaking results in dry, hard rolls that lose their soft, tender texture.
- It’s important to get the timing and temperature just right.
How to Avoid This Mistake:
- Bake the rolls at the recommended temperature (375°F/190°C) and check for doneness around 20-25 minutes.
- The rolls should be golden brown on top, and you should be able to insert a toothpick into the center without any raw dough sticking to it.
- If the tops of the rolls are browning too quickly but they are not yet cooked through, cover them loosely with foil and continue baking until fully done.
📌 Pro Tip: Use a meat thermometer to check the internal temperature of the rolls. They should reach about 190°F (88°C) internally to ensure they’re fully cooked.
7. Overfilling or Underfilling the Rolls
The amount of cinnamon-sugar filling you use can make a huge difference in the texture and flavor of your rolls. Using too little filling can result in bland, dry rolls, while too much filling can make them difficult to roll and cause the filling to spill out during baking.
Why It’s Important:
- Too much filling can make the rolls difficult to roll up neatly and may lead to the filling oozing out during baking, resulting in uneven rolls.
- Too little filling makes for a lackluster, underwhelming flavor.
How to Avoid This Mistake:
- Spread an even layer of cinnamon-sugar mixture over the dough, ensuring that it covers the entire surface, but don’t overdo it. It should be enough to flavor each bite without overwhelming the dough.
- Use a light hand when rolling the dough to avoid squeezing the filling out.
📌 Pro Tip: If your rolls do spill out during baking, simply let them cool slightly, then scrape the gooey filling into a bowl, heat it up, and drizzle it back over the rolls as a syrup!
Best Frosting Options
When it comes to sourdough cinnamon rolls, the frosting is the crowning touch that transforms them from delicious to indulgent. The right frosting not only adds a creamy, sweet contrast to the tangy sourdough rolls but also enhances their overall flavor and texture. Whether you prefer a classic, rich cream cheese frosting or something more creative, the frosting you choose can elevate your cinnamon rolls to a whole new level. Here are some of the best frosting options for sourdough cinnamon rolls:
1. Classic Cream Cheese Frosting
Cream cheese frosting is the most popular choice for cinnamon rolls, and for good reason. Its rich, tangy flavor pairs perfectly with the sweet and spiced filling of the rolls. The creaminess of the frosting balances out the slightly tangy flavor of the sourdough, adding a smooth, decadent texture that’s not too heavy.
You could link to a reputable source about the benefits or history of sourdough or something related to baking techniques.
For example:
- The Sourdough School – A great resource for all things sourdough, from beginner tips to advanced baking techniques.
Why It’s Great:
- The tanginess of the cream cheese enhances the sourdough flavor while providing a creamy texture that contrasts nicely with the soft and fluffy rolls.
- It’s easy to make with just a few ingredients, making it a convenient option for busy bakers.
How to Make Classic Cream Cheese Frosting:
- Ingredients: 8 oz cream cheese (softened), 4 cups powdered sugar, 2 tbsp butter (softened), 1 tsp vanilla extract, and a pinch of salt.
- Instructions: Beat the cream cheese and butter together until smooth and fluffy. Gradually add the powdered sugar, a little at a time, and continue beating until it’s fully incorporated and smooth. Add the vanilla extract and salt, and beat until well combined. If the frosting is too thick, you can add a tiny bit of milk to thin it out to your desired consistency.
📌 Pro Tip: If you prefer a less sweet version of cream cheese frosting, reduce the amount of powdered sugar by half or adjust to taste. This allows the tangy cream cheese flavor to shine more through.
2. Vanilla Glaze
If you’re looking for a lighter frosting option, a simple vanilla glaze might be the perfect choice. This glaze is thinner and more delicate than cream cheese frosting, making it a great way to add a touch of sweetness without overpowering the rolls. The glaze provides a smooth, glossy finish that adds a slight sweetness to the sourdough rolls.
Why It’s Great:
- A simple glaze won’t overpower the flavors of the cinnamon rolls themselves, and it lets the taste of the rolls take center stage.
- The glaze’s shiny finish gives your rolls an aesthetically pleasing appearance, making them look as good as they taste.
How to Make Vanilla Glaze:
- Ingredients: 1 cup powdered sugar, 2 tbsp milk, 1 tsp vanilla extract, pinch of salt.
- Instructions: In a bowl, whisk together powdered sugar, milk, and vanilla extract until smooth. If the glaze is too thick, add a little more milk, one teaspoon at a time, until you reach the desired consistency. Drizzle the glaze generously over the warm cinnamon rolls.
📌 Pro Tip: For an extra flavor twist, consider adding a little cinnamon or a few drops of almond extract to the glaze for a deeper flavor profile.
3. Maple Cream Cheese Frosting
If you love the flavor of maple syrup, then this maple cream cheese frosting is the perfect way to enhance your sourdough cinnamon rolls. The addition of maple syrup gives the frosting a unique, warm sweetness that pairs beautifully with the cinnamon and sourdough flavors.
Why It’s Great:
- Maple syrup adds a natural sweetness that complements the earthy flavors of sourdough and the spiced cinnamon filling.
- The combination of cream cheese and maple syrup creates a silky, indulgent frosting with just the right balance of tanginess and sweetness.
How to Make Maple Cream Cheese Frosting:
- Ingredients: 8 oz cream cheese (softened), 4 cups powdered sugar, 1/4 cup pure maple syrup, 2 tbsp butter (softened), 1 tsp vanilla extract, and a pinch of salt.
- Instructions: Beat the softened cream cheese and butter until smooth. Gradually add the powdered sugar, followed by the maple syrup, vanilla extract, and salt. Continue beating until the frosting is smooth and fluffy. If the frosting is too thick, add a bit of milk to achieve your desired consistency.
📌 Pro Tip: For an extra maple flavor, drizzle some extra maple syrup over the rolls before frosting them, or even mix a little syrup into the dough before baking.
4. Brown Butter Cinnamon Frosting
For a more rich and savory option, brown butter cinnamon frosting offers a deeper, nutty flavor that elevates your cinnamon rolls. The nutty, caramelized flavor of the brown butter combined with cinnamon provides a decadent and indulgent frosting that pairs perfectly with the spiced dough.
Why It’s Great:
- The caramelized flavor of brown butter adds a depth of richness that brings out the warm cinnamon and sourdough notes in the rolls.
- This frosting is an elevated version of a traditional cinnamon frosting, creating a more gourmet experience.
How to Make Brown Butter Cinnamon Frosting:
- Ingredients: 4 tbsp butter, 2 cups powdered sugar, 1/2 tsp cinnamon, 1 tsp vanilla extract, 2 tbsp milk.
- Instructions: Begin by browning the butter in a saucepan over medium heat, stirring constantly to avoid burning. Once the butter turns golden brown and releases a nutty aroma, remove it from the heat and let it cool. In a separate bowl, whisk together powdered sugar, cinnamon, and vanilla extract. Slowly add the browned butter and milk, whisking until the frosting is smooth and creamy. Adjust the milk as necessary for your desired consistency.
📌 Pro Tip: Make sure to cool the browned butter slightly before adding it to the frosting mixture to avoid melting the powdered sugar. If you want a darker brown butter flavor, let the butter cook a little longer until it’s deeply browned.
5. Nutella Frosting
For a chocolatey twist, Nutella frosting offers a rich, creamy option that pairs beautifully with cinnamon rolls. This is a great option for anyone who loves chocolate and wants a fun, decadent variation of the classic cream cheese frosting.
Why It’s Great:
- Nutella adds a unique hazelnut and chocolate flavor that complements the cinnamon in the rolls, creating a fusion of sweet and savory flavors.
- The smooth, creamy texture of Nutella frosting is perfect for a guilt-free indulgence.
How to Make Nutella Frosting:
- Ingredients: 1/2 cup Nutella, 4 oz cream cheese (softened), 1 cup powdered sugar, 1 tsp vanilla extract, and a pinch of salt.
- Instructions: Beat the softened cream cheese and Nutella together until smooth and fluffy. Gradually add powdered sugar, and continue beating until well combined. Add vanilla extract and a pinch of salt, and beat again until smooth. If needed, add a bit of milk or cream to thin the frosting to your desired consistency.
📌 Pro Tip: For an extra layer of flavor, sprinkle some chopped hazelnuts or shaved chocolate on top of the Nutella frosting for texture and a finishing touch.
6. Whipped Cream Frosting
If you prefer a lighter, fluffier option, whipped cream frosting might be the perfect choice. It’s not as dense as cream cheese frosting but still provides a sweet, airy contrast to the cinnamon rolls. The lightness of whipped cream complements the slightly tangy sourdough dough.
Why It’s Great:
- Light and airy, whipped cream frosting won’t overpower the flavors of the cinnamon rolls but still adds a lovely creamy texture.
- It’s perfect for those who prefer something less rich and more delicate.
How to Make Whipped Cream Frosting:
- Ingredients: 1 cup heavy whipping cream, 2 tbsp powdered sugar, 1 tsp vanilla extract.
- Instructions: Beat the heavy cream with powdered sugar and vanilla extract until stiff peaks form. Be careful not to overwhip the cream. Once stiff peaks have formed, spread the whipped cream over the cooled cinnamon rolls.
📌 Pro Tip: For a more stable whipped cream frosting, add a little cream cheese or mascarpone to stabilize the whipped cream, making it less likely to melt or lose its texture over time.
Final Thoughts
No matter what kind of frosting you choose, the key is to find one that complements the fluffy, tangy sourdough cinnamon rolls while enhancing the overall flavor profile. From classic cream cheese to brown butter cinnamon frosting, each option brings something unique to the table, allowing you to personalize your cinnamon rolls to suit your tastes. Don’t be afraid to get creative and try different combinations to discover your favorite way to top off these delicious homemade treats.
as a chef
As a chef, you understand that frosting isn’t just a sweet topping—it’s an integral part of the dish that complements the flavors and enhances the texture of your sourdough cinnamon rolls. When selecting or creating the perfect frosting, you want to consider the balance between the richness of the rolls and the lightness of the frosting, as well as how the frosting pairs with the unique tang of the sourdough. Here’s a deeper dive into some of the best frosting options that are chef-approved and designed to elevate your cinnamon rolls into a truly gourmet experience.